Tag: mulch

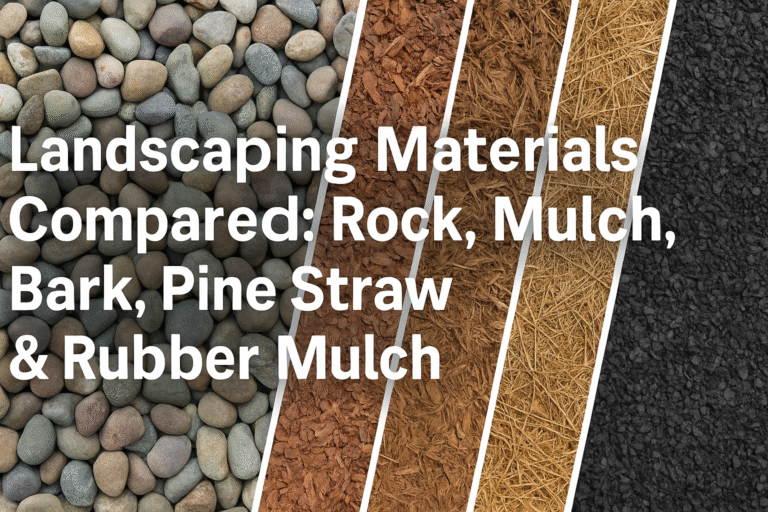
  • Landscaping Materials Compared: Rock, Mulch, Bark, Pine Straw & Rubber

    Choosing the right landscaping material can make or break the look, feel, and health of your yard. Whether you’re a homeowner doing a full landscape makeover or just refreshing your flowerbeds, understanding the pros and cons of materials like rock, wood mulch, bark, pine straw, and rubber mulch is critical to success. Each material offers unique benefits — and some drawbacks — when it comes to cost, durability, appearance, plant health, and weed control.

    This guide will help you choose the best material for your landscaping goals and budget. Let’s dive into a comprehensive breakdown of each popular option.


    1. Landscaping Rock

    ✅ Benefits of Landscaping Rock

    • Extremely Durable: Rock doesn’t break down over time, making it a long-lasting material that won’t need frequent replacement.
    • Excellent for Weed Control: When paired with landscape fabric, rock does a solid job of suppressing weeds.
    • Low Maintenance: Unlike organic options, rock doesn’t need to be replaced every year and doesn’t attract pests or mold.
    • Modern Look: Decorative gravel and river rock offer a clean, modern, or desert-like aesthetic depending on the type used.

    ❌ Disadvantages of Landscaping Rock

    • High Upfront Cost: Rock is more expensive initially than organic materials. Installation costs are also higher due to labor intensity.
    • Retains Heat: Especially in full sun, rocks can radiate heat that may stress plants and dry out the soil.
    • Not Ideal for Plant Growth: Because it doesn’t enrich the soil, rock doesn’t support healthy plant development.

    💰 Cost Estimate:

    $50–$100 per ton, or around $1.00–$3.00 per square foot installed.

    🌿 Best Uses:

    Dry climates, modern homes, xeriscaping, or areas with little plant growth like walkways and driveways.


    2. Wood Mulch

    ✅ Benefits of Wood Mulch

    • Improves Soil Health: As it decomposes, it adds organic matter to the soil, improving fertility and structure.
    • Moisture Retention: Wood mulch helps the soil retain moisture, reducing watering needs for your plants.
    • Affordable: Readily available and inexpensive, especially if you buy in bulk or get it from local tree trimming companies.
    • Natural Look: Wood mulch has a classic, earthy aesthetic that complements most homes and gardens.

    ❌ Disadvantages of Wood Mulch

    • Breaks Down Quickly: Needs to be replenished annually or biannually, increasing long-term costs and labor.
    • Can Attract Pests: Termites and other insects may be drawn to wood mulch, especially near the home’s foundation.
    • Color Fading: Dyed mulches fade quickly in sun exposure.

    💰 Cost Estimate:

    $2–$5 per bag or $25–$45 per cubic yard (bulk).

    🌿 Best Uses:

    Garden beds, vegetable patches, flower beds, and around trees and shrubs where soil health is a priority.


    3. Bark Mulch

    ✅ Benefits of Bark Mulch

    • Natural Appearance: Bark creates a rustic, well-groomed look that blends seamlessly with trees and wooded landscapes.
    • Soil Enrichment: Like wood mulch, bark breaks down and adds nutrients back into the soil.
    • Moisture and Temperature Control: Protects plant roots from extreme temperature fluctuations and retains moisture efficiently.

    ❌ Disadvantages of Bark Mulch

    • Lightweight: Can be washed away in heavy rain or blown around by the wind if not properly settled.
    • Decomposes Quickly: Needs replacement every year or two.

    💰 Cost Estimate:

    $3–$7 per bag or $30–$60 per cubic yard.

    🌿 Best Uses:

    Shaded flower beds, ornamental gardens, and woodland areas. Ideal for areas with many trees where it enhances the natural look.


    4. Pine Straw

    ✅ Benefits of Pine Straw

    • Easy to Spread: Lightweight and quick to install without heavy equipment.
    • Great for Acid-Loving Plants: Slowly releases acidity into the soil, which is beneficial for azaleas, blueberries, and hydrangeas.
    • Natural, Southern Look: Offers a soft, finished look that’s especially popular in southern landscapes.
    • Cost-Effective: Cheaper than most mulching materials when bought in bales.

    ❌ Disadvantages of Pine Straw

    • Flammable: More likely to catch fire than other options, so not ideal in wildfire-prone areas.
    • Needs Frequent Refreshing: Breaks down quickly and loses color, requiring regular touch-ups every 6–12 months.
    • Less Effective at Weed Control: Thinner coverage can allow some weed growth unless layered thickly.

    💰 Cost Estimate:

    $4–$7 per bale. Each bale covers approximately 35–50 square feet.

    🌿 Best Uses:

    Garden beds, pathways, and around trees, especially where acidic soil is beneficial.


    5. Rubber Mulch

    ✅ Benefits of Rubber Mulch

    • Extremely Durable: Doesn’t decompose or fade, lasting for years without needing replacement.
    • Superior Weed Control: Offers excellent coverage and doesn’t promote weed growth.
    • Shock Absorbent: Often used in playgrounds and pet areas for safety due to its cushioning effect.
    • Color Retention: Available in multiple colors that resist fading in the sun.

    ❌ Disadvantages of Rubber Mulch

    • Expensive: Higher upfront costs than most other mulch types.
    • No Soil Benefits: Doesn’t improve soil health or structure, as it’s non-organic.
    • Potential Chemical Leaching: Some studies suggest rubber may release chemicals over time, affecting soil and water.

    💰 Cost Estimate:

    $6–$12 per bag or $80–$120 per cubic yard.

    🌿 Best Uses:

    Playgrounds, pet areas, high-traffic paths, or beds where long-term durability outweighs soil health needs.


    Comparison Table: At a Glance

    MaterialCostDurabilitySoil HealthWeed ControlAesthetics
    RockHighVery HighLowGoodModern/Clean
    Wood MulchLowLowExcellentGoodNatural/Woodsy
    BarkMediumMediumGoodModerateRustic
    Pine StrawLowLowModerateLowSoft/Natural
    Rubber MulchHighVery HighNoneExcellentColorful/Modern

    Final Verdict: Which Is Best for You?

    • Best for Budget: Pine straw or bulk wood mulch
    • Best for Long-Term Value: Rock or rubber mulch
    • Best for Plant Health: Bark or wood mulch
    • Best for Weed Control: Rubber mulch or rock (with landscape fabric)
    • Best Appearance: Depends on the style of your home — bark and wood mulch are natural and versatile, rock is sleek and modern, while pine straw offers a Southern charm.

    Ultimately, the right material depends on your landscape goals. Mixing materials is also an option. For instance, use wood mulch in your garden beds and decorative gravel for walkways. Just make sure it all works together visually and functionally.
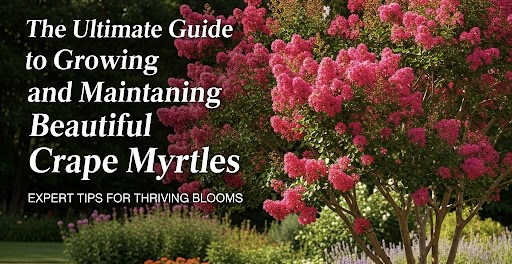
  • The Ultimate Guide to Growing and Maintaining Beautiful Crape Myrtles

    Crape Myrtles are some of the most beloved ornamental trees and shrubs for Southern and warm-climate landscapes. Known for their vibrant blooms, graceful bark, and long summer color, these plants can transform any yard into a colorful retreat.

    If you’ve ever admired a row of pink, red, purple, or white flowering trees in the summer heat, you’ve probably been enjoying Crape Myrtles. This guide will cover the different types, bloom times, essential maintenance tips, and how to protect them from fungus and insects—including the notorious Cercospora leaf spot.


    Types of Crape Myrtles

    Crape Myrtles (Lagerstroemia indica and hybrids) come in a variety of sizes, colors, and growth habits, making it easy to find the perfect type for your yard.

    • Dwarf Varieties
      • Height: 2–5 feet
      • Perfect for containers, borders, or small landscapes.
      • Popular Varieties: Pocomoke, Berry Dazzle, Chickasaw
    • Medium-Sized Varieties
      • Height: 6–15 feet
      • Great for small trees or large shrubs; ideal for privacy screens or driveway borders.
      • Popular Varieties: Tonto, Sioux, Hopi
    • Tree-Form or Tall Varieties
      • Height: 15–30 feet
      • Stunning as standalone yard trees or street plantings.
      • Popular Varieties: Natchez (white), Tuscarora (coral-pink), Muskogee (lavender)

    When Do Crape Myrtles Bloom?

    One of the reasons Crape Myrtles are so popular is their long bloom period, often lasting 90–120 days in summer.

    • Early Bloomers (June–July): Sioux, Natchez
    • Mid-Summer Bloomers (July–August): Tuscarora, Muskogee
    • Late Bloomers (August–September): Tonto, Dynamite

    Pro Tip: Regular deadheading (removing spent flowers) can encourage a second wave of blooms in many varieties.


    Maintenance Tips for Healthy Crape Myrtles

    Crape Myrtles are low-maintenance, but they still need the right care to thrive.

    1. Pruning the Right Way

    • Avoid “Crape Murder,” the harsh cutting back that ruins their natural shape.
    • Only remove crossing branches, dead wood, or suckers at the base.
    • Best Time to Prune: Late winter to very early spring, before new growth starts.

    2. Watering and Feeding

    • Water young trees once or twice per week during dry spells.
    • Apply a balanced slow-release fertilizer in spring for the best blooms.

    Recommended Product:
    Osmocote Smart-Release Plant Food


    Protecting Crape Myrtles from Fungus

    One of the most common fungal issues is Cercospora leaf spot, which causes yellowing leaves and premature leaf drop in late summer.

    Signs of Cercospora Leaf Spot

    • Yellow or orange spotting on leaves
    • Early leaf drop, often starting from the bottom of the tree upward

    How to Prevent and Treat Fungus

    1. Plant in Full Sun – Shade encourages fungal growth.
    2. Water at the Base – Avoid wetting leaves.
    3. Use Fungicide Early in the Season if you notice early spots.

    Suggested Fungicide Products:
    BioAdvanced 12 Month Tree Protect & Feed Concentrate
    Southern Ag Liquid Copper Fungicide


    Controlling Insects on Crape Myrtles

    Crape Myrtles are generally pest-resistant, but a few insects can cause issues:

    • Aphids – Cause sticky honeydew and black sooty mold.
    • Crape Myrtle Bark Scale (CMBS) – Causes white, waxy buildup on branches.

    Best Practices for Insect Control

    1. Blast Aphids Off with Water – Often all that’s needed for minor infestations.
    2. Apply Horticultural Oil or Neem Oil in spring to suffocate overwintering insects.
    3. Use Systemic Insecticides if infestations are heavy.

    Suggested Insect Control Products:
    Trifecta Crop Control Ready to Use Maximum Strength Natural Pesticide


    Summary: Thriving Crape Myrtles All Season

    Crape Myrtles are low-maintenance, long-blooming trees that can bring spectacular summer color to your landscape. By:

    • Choosing the right type for your yard
    • Pruning and watering correctly
    • Protecting from fungus and insects

    …you can enjoy a healthy, vibrant display year after year.

    If you see yellowing leaves with spots, don’t panic—it’s often Cercospora leaf spot, and with the right fungicide and care, your tree will bounce back beautifully.

  • How to Sand Level Your Yard: Complete Guide, Costs, Benefits, and Tools

    A perfectly smooth lawn is more than just eye candy—it makes mowing easier, improves grass health, and prevents water pooling.
    If your yard is full of bumps, dips, or uneven spots, sand leveling—also known as lawn topdressing—is one of the best DIY ways to fix it.
    This guide will teach you everything you need to know about sand leveling your yard, including:

    • The step‑by‑step process to level your yard
    • When to do it and how often
    • Which type of sand to use
    • Cost and DIY vs. professional breakdowns
    • Top recommended tools, including Amazon affiliate picks

    Whether you have a bumpy Bermuda grass lawn or a cool‑season grass yard, learning to sand level can completely transform your landscape—and save you thousands compared to hiring a pro.


    What is Sand Leveling?

    Sand leveling, also called topdressing, is the process of spreading a thin, even layer of sand—or a sand‑soil mix—over your lawn to smooth out uneven surfaces. Over time, most lawns develop:

    • Low spots caused by soil settling
    • Bumps from tree roots, ant mounds, or debris
    • Water pooling areas from poor drainage
    • General unevenness caused by foot traffic, pets, or mowing

    Sand fills these low spots and helps create a smooth, uniform surface. Over a few weeks, grass grows through the sand layer and recovers with an even, professional‑looking finish.

    Golf courses, sports fields, and professional landscapes use sand leveling regularly to maintain perfect turf conditions. Homeowners can achieve the same results without heavy machinery.


    When Should You Sand Level Your Yard?

    Timing is everything in lawn care. Sand leveling works best when your grass is actively growing, so it can recover quickly and fill in the sanded areas.

    Best Timing by Grass Type

    • Warm‑season grasses (Bermuda, Zoysia, St. Augustine): Late spring to mid‑summer, once the lawn is green and growing vigorously.
    • Cool‑season grasses (Fescue, Kentucky bluegrass, Ryegrass): Early fall or late spring, avoiding summer heat stress.

    Avoid winter or dormant periods. Leveling a dormant lawn can smother grass and slow recovery.

    Signs Your Lawn is Ready for Leveling

    • Your mower frequently scalps high spots
    • Water pools after rain or irrigation
    • The lawn feels bumpy when walking barefoot
    • Grass growth looks uneven or patchy

    Benefits of Sand Leveling Your Yard

    Sand leveling offers immediate and long‑term benefits that go beyond aesthetics:

    • Smoother mowing: Prevents mower scalping and reduces wear on equipment.
    • Improved drainage: Reduces puddles and waterlogging in low spots.
    • Healthier grass: Encourages even growth and better root contact with soil.
    • Reduced trip hazards: Creates a safer yard for kids, pets, and foot traffic.
    • Better curb appeal: A flat, professional‑looking lawn adds to your property value.
    • Long‑lasting results: Sand does not decompose, so once your lawn is leveled, it stays smoother over time.

    Tools You’ll Need

    You can sand level your lawn with basic tools, but having the right equipment makes the job faster and easier.
    Here’s the essential DIY leveling toolkit:

    • Wheelbarrow or buckets – to transport sand
    • Shovel – for filling low spots
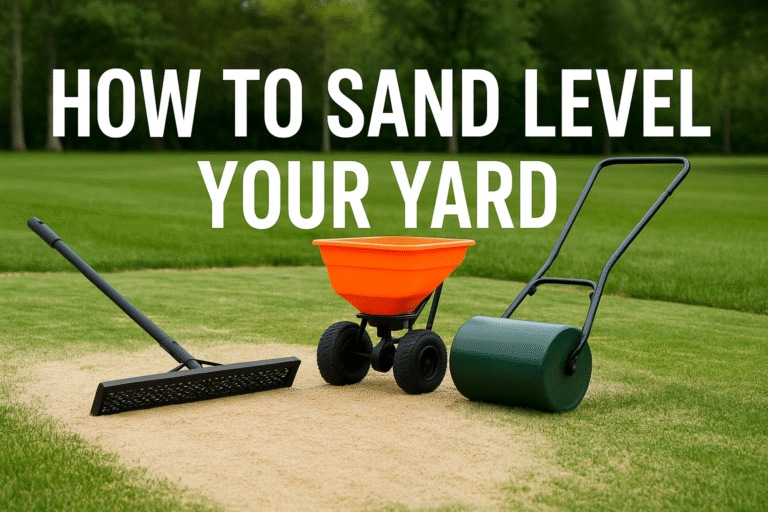
    • Leveling rake or lawn lute – for spreading and smoothing sand evenly
    • Push broom – to work sand into grass blades
    • Lawn roller (optional) – to compact sand and create a perfectly smooth finish

    Below, we’ve included three recommended Amazon tools that make leveling much easier.


    Recommended Amazon Tools for Lawn Leveling

    Using high‑quality tools saves time and produces a more professional finish. Here are three top picks with your affiliate code ready to use:

    1. Heavy‑Duty Lawn Leveling Rake

    A lawn leveling rake is a must‑have for spreading sand smoothly. Its wide, flat head helps feather out sand without gouging the grass.


    👉 Check Price on Amazon

    2. Broadcast Spreader

    A broadcast spreader helps distribute sand or sand‑soil mix more evenly across larger areas. It’s also perfect for fertilizer and seed applications year‑round.


    👉 Check Price on Amazon

    3. Lawn Roller

    A lawn roller helps compact sand and smooth your surface after spreading. It also assists in pressing grass roots back into soil contact.


    👉 Check Price on Amazon

    Tip: If your lawn is small, you can get away without the roller. For larger lawns, it makes a big difference.


    Types of Sand You Can Use

    Not all sand is created equal. The right sand improves drainage and levels the lawn without compacting your soil.
    Here are the best options:

    • Washed Masonry Sand: Fine, clean sand that blends with soil. Most recommended for homeowners.
    • USGA Golf Course Sand: Consistent particle size and great for drainage, though pricier.
    • Sand/Compost Mix: 70% sand and 30% compost adds organic matter to your lawn while leveling.

    Avoid play sand or construction sand—they’re often too fine or contain debris, which can lead to compaction and poor drainage.


    Step‑by‑Step: How to Sand Level Your Lawn

    Leveling your yard can be a satisfying weekend project. Follow these steps for the best results:

    1. Mow your lawn short. Trim grass 30–50% lower than usual to expose bumps and low spots.
    2. Dethatch or aerate. If you have a heavy thatch layer, remove it so sand can reach the soil.
    3. Identify low spots. Walk the yard or use a straight board to see dips.
    4. Apply sand or topdressing mix. Focus first on the lowest areas.
    5. Spread evenly with your leveling rake. Feather edges to blend smoothly with existing grass.
    6. Brush or drag sand into grass. A push broom or drag mat works well.
    7. Water lightly. Helps sand settle without washing it away.
    8. Repeat lightly if needed. Multiple thin layers are better than one heavy application.

    Cost of Sand Leveling

    The cost of sand leveling depends on your yard size, sand type, and whether you hire a professional.

    DIY Cost Breakdown

    • Sand: $40–$80 per cubic yard (covers ~1,000 sq. ft. at ¼” depth)
    • Tool rental: $20–$50/day for a roller or leveling rake
    • Total for small lawn (1,000–2,000 sq. ft.): $100–$300

    Professional Service Costs

    Hiring a pro can cost $1,000–$3,000+ depending on yard size. DIY is a fraction of the price.

    Cost Benefit: Doing it yourself with $200 of materials can save thousands—and the tools can be reused yearly.


    Final Tips for Success

    • Apply sand in thin layers to avoid smothering grass.
    • Level in growing season for quick recovery.
    • Use clean, washed sand to prevent weed contamination.
    • Water lightly after each application to help sand settle.

    In 2–4 weeks, your lawn will start to show results: smoother mowing, healthier grass, and a professional look right at home.