
Posted on — Leave a comment

Brown Tips in a Bermuda Lawn During September: Stress, Mower Damage, or a Normal Seasonal Change?

Close-up of green Bermuda lawn showing scattered brown and tan tips during September.

A thick, green Bermuda lawn can look nearly perfect throughout the summer. Then September arrives, you finish mowing, and suddenly hundreds of tan or brown tips seem to appear across the surface.

The lawn may still be dense and green underneath, but those light-colored tips make the entire yard look faded. They are especially noticeable when the sun hits the lawn or when the grass is viewed from a lower angle.

Naturally, the first question is:

What went wrong?

Brown tips can be caused by several things, including a dull mower blade, drought stress, scalping, disease, insects, or an inconsistent mowing schedule. However, when the lawn has been maintained properly and the grass appears healthy near the base, the changing season may be responsible.

September is a transitional month for Bermuda grass. The calendar may still say summer, especially here in the Southeast, but the lawn is already responding to shorter days, cooler nights, changing sunlight, and slower growth.

Sometimes there is nothing you need to spray. There may not be a product that can immediately correct the appearance. The best response may be to continue providing good maintenance and allow the Bermuda to move through its natural seasonal cycle.

Why Brown Tips Become More Noticeable in September

Bermuda grass is a warm-season grass that performs best during long, hot, sunny days. Its most aggressive growth normally occurs during late spring and summer when soil temperatures are warm and daylight is plentiful.

September begins changing that environment.

Even when daytime temperatures remain high, several seasonal changes are taking place:

  • The days are becoming shorter.
  • The angle and intensity of sunlight are changing.
  • Overnight temperatures may begin dropping.
  • Morning dew can remain on the grass longer.
  • Soil temperatures gradually begin declining.
  • Bermuda’s rate of growth and recovery starts slowing.

Bermuda does not normally enter full dormancy during September in Northern Alabama, but it can begin showing signs that the peak growing season is ending.

This transition does not always happen evenly. Some blades may remain completely green while others develop tan tips, older tissue, or seed stalks. Areas that receive less sunlight or experience greater stress may change before the warmest and sunniest sections of the lawn.

The result can be a lawn that looks green from a distance but appears sprinkled with tan material after mowing.

First, Look Closely at the Grass

Before applying fertilizer, iron, fungicide, or another lawn product, pull several blades from different areas and inspect them closely.

The appearance of the individual blades can tell you much more than looking at the entire lawn from a distance.

A clean brown or tan section at the top

If the grass is green and healthy from the base upward but the upper portion is tan, the discolored tissue may be older growth, a spent seed stalk, or tissue responding to seasonal stress.

This does not automatically mean the lawn is dying.

Ragged, shredded, or stringy tips

If the ends look torn, fuzzy, or shredded, inspect your mower.

A dull rotary blade can beat and tear the grass instead of cutting it cleanly. Those damaged ends lose moisture and turn tan or brown, sometimes within hours of mowing.

The same general principle applies to a reel mower. A reel that is dull, improperly adjusted, or making poor contact with the bedknife can leave grass with an uneven or frayed cut.

Alabama Cooperative Extension notes that mower sharpening may be required several times during a growing season, depending on mowing frequency, grass type, and contact with debris. A sharp cutting surface becomes particularly important on Bermuda maintained at a low height.

A straight, clean cut with green tissue below it

A clean cut normally indicates that the mower is doing its job. If the remaining plant is green and the lawn is not thinning, the discoloration may simply be older leaf tissue or seasonal material that has moved above the normal canopy.

Tall, thin, light-colored stems

These may be Bermuda seed stalks rather than ordinary leaf blades.

Seed stalks often stand above the green canopy, making them the first thing the mower touches. After they are cut, the remaining portions can appear tan or white against the darker lawn.

Bermuda may produce seed heads in response to its natural growth cycle, environmental changes, or stress. Their presence does not necessarily mean the lawn has a serious problem.

Could the Mower Be Causing the Brown Tips?

A dull or improperly adjusted mower should always be one of the first things you eliminate.

With a rotary mower, inspect the grass for shredded ends. Check the blade for damage, dull edges, bends, and buildup underneath the deck.

With a reel mower, perform a paper-cut test across multiple areas of the reel. The reel and bedknife should cut paper consistently from one side to the other. A reel can appear sharp but still leave a poor cut if the reel-to-bedknife relationship is not set correctly.

Also consider the amount of grass removed.

Removing too much of the green canopy in a single mowing can expose brown stems, stolons, thatch, and older plant material underneath. This is commonly described as scalping, even when the mower does not physically touch the soil.

Follow the one-third rule whenever possible: avoid removing more than approximately one-third of the grass blade in a single mowing.

That rule becomes even more important in September because Bermuda may not recover as quickly as it did during June, July, or August.

North Carolina State Extension recommends raising Bermuda’s mowing height slightly as fall approaches, with the timing depending on location and climate. For a highly maintained, low-cut lawn, that does not necessarily mean making a dramatic height change. Even a modest increase can leave more green tissue on the plant and reduce the chance of exposing the brown material below.

September Stress Can Show Up After Mowing

Mowing does not always cause the discoloration. Sometimes mowing simply reveals stress that was already present.

A dense canopy can hide tan stems and older growth. Once the upper green portion is removed, that material becomes more visible.

Possible September stressors include:

  • Extended dry weather
  • Irregular irrigation
  • Excessive irrigation
  • Compacted soil
  • Heavy traffic
  • Low mowing
  • Rapid changes in temperature
  • Reduced sunlight
  • Excessive thatch
  • Recent herbicide applications
  • Heavy fertilizer applications
  • Repeated scalping

Look for patterns before selecting a treatment.

Drought stress often appears first in areas near concrete, slopes, compacted sections, or places receiving poor sprinkler coverage. Mower problems usually appear more uniformly or follow the mowing pattern. Disease is more likely to create distinct patches, lesions, thinning, or areas that continue expanding.

Seasonal change can appear as a more general loss of color or scattered tan material throughout an otherwise healthy lawn.

Will Liquid Iron Turn the Brown Tips Green?

No. Iron cannot bring dead or damaged tissue back to life.

A liquid iron application may deepen the color of living green tissue if the lawn is actively growing and the product is appropriate for the grass. That darker background can sometimes reduce the visual contrast of the tan tips, making the overall lawn appear greener.

However, the brown portions themselves will remain brown.

The same rule applies to fertilizer and biostimulants. These products may support living turf when used correctly, but they cannot recolor tissue that has already dried, been torn by a mower, or entered seasonal decline.

The brown material must eventually be removed through mowing, break down naturally, or be replaced by new growth.

This is why spraying more products is not always the answer.

Should You Apply Nitrogen to Force New Growth?

Be careful about trying to force summer-level growth as fall approaches.

During the active growing season, properly timed nitrogen can help Bermuda recover and produce new green tissue. As growth begins slowing, however, the lawn may not respond as quickly or evenly.

Excessive late-season nitrogen can encourage tender growth at the wrong time and may increase management or disease concerns. Fertilizer decisions should be based on your location, soil-test results, recent applications, weather, and the amount of active growth remaining.

If you recently applied nitrogen, avoid stacking another application simply because you see tan tips after mowing.

Give the lawn time to respond. More fertilizer is not automatically a faster or better solution.

Could It Be a Lawn Disease?

Disease should remain on the checklist, but scattered tan tips do not automatically justify applying a fungicide.

Look for additional symptoms such as:

  • Circular or irregular patches
  • Areas that continue expanding
  • Significant thinning
  • Spots or lesions along individual blades
  • A dark border surrounding a tan lesion
  • Cotton-like fungal growth during early morning hours
  • Grass that pulls loose from the crown
  • Consistently wet areas with poor drainage

If the entire lawn remains dense and green at its base while only the tips or tall stalks are tan, a widespread destructive disease is less likely.

Applying a fungicide without identifying a disease can waste money and may do nothing to improve the lawn. When symptoms are unclear or continue worsening, send samples and photographs to your local Extension office or turf diagnostic laboratory.

When the Best Treatment Is Patience

Lawn enthusiasts are trained to react.

We see a color change and immediately begin thinking about iron, nitrogen, fungicide, insecticide, irrigation adjustments, or another product that promises a quick response.

But Bermuda is a living plant operating on a seasonal schedule.

By September, it is beginning to prepare for a slower period. In Northern Alabama, hot afternoons can make the lawn feel like it should still be growing at full summer speed. Shorter days and cooler nights tell the plant something different.

If you have confirmed that:

  • Your mower is cutting cleanly
  • You are not removing too much grass
  • The lawn is receiving appropriate water
  • There are no clear signs of insects or disease
  • The base of the plant remains green and healthy
  • The lawn is not rapidly thinning

Then the tan tips may not require treatment.

Continue mowing as needed, monitor soil moisture, avoid aggressive renovation work, and allow the lawn to progress naturally.

You may not be able to spray away every seasonal imperfection — and that is perfectly normal.

A Simple September Checklist for Bermuda Lawns

When brown tips appear, work through this checklist before applying anything:

1. Inspect individual blades

Determine whether the ends are cleanly cut, shredded, spotted, or attached to tall seed stalks.

2. Check the mower

Inspect or sharpen rotary blades. For reel mowers, confirm the reel and bedknife cut paper consistently across the entire width.

3. Review your mowing height

Make sure you are not removing too much of the canopy at once. Consider a small seasonal height increase as recovery begins slowing.

4. Check soil moisture

Do not judge moisture by the surface alone. Check the soil several inches down and inspect sprinkler coverage.

5. Look for a pattern

Uniform discoloration, mowing stripes, dry edges, circular patches, and isolated problem areas may point to different causes.

6. Review recent applications

Consider whether fertilizer, herbicide, plant growth regulator, iron, or another lawn product was recently applied.

7. Watch the lawn for several days

If the base remains healthy and the problem does not expand, immediate treatment may be unnecessary.

What Not to Do

Avoid making several corrective applications at the same time.

For example, applying fertilizer, iron, fungicide, and additional irrigation together makes it nearly impossible to determine what was actually happening. It can also create new stress when the lawn was already beginning a normal seasonal transition.

Instead, eliminate the simplest causes first:

  • Confirm the quality of cut.
  • Confirm the mowing height.
  • Confirm soil moisture.
  • Inspect for disease or insects.
  • Allow time for observation.

Good lawn care is not always about adding something. Sometimes it is about knowing when to step back.

The Bottom Line

Brown tips in a September Bermuda lawn can be frustrating, especially after months of maintaining a deep green, tightly cut surface.

Sometimes the mower is responsible. Sometimes the lawn is dry, stressed, scalped, or affected by disease. Those possibilities should be investigated.

But when the mower is sharp, the watering is correct, the lawn is dense, and the grass remains green near the base, the changing season may be the real explanation.

September Bermuda will not always look exactly like July Bermuda.

Growth is beginning to slow. Older tissue becomes more visible. Seed stalks may stand above the canopy. The lawn’s color and texture may become less consistent as the plant responds to shorter days and cooler nights.

Iron may darken the living tissue, but it will not turn dead tips green. Fertilizer cannot reverse seasonal aging. Fungicide will not correct a problem that is not caused by a fungus.

Sometimes the proper treatment is simply good mowing, appropriate watering, careful observation, and patience.

The goal should not be to force Bermuda to behave like it is midsummer forever. The goal is to guide it through the seasonal transition in the healthiest condition possible so it can rest during winter and return strong next spring.

That is one of the hardest lessons in maintaining a great Bermuda lawn:

Not every color change requires a product, and not every brown tip means something is wrong.


LandscapeMarks™ shares practical lawn-care experiences for DIY homeowners. Always follow product labels and consult your local Extension office when diagnosing persistent turf damage.
Posted on — Leave a comment

How to Maintain a Thick Green Healthy Bermuda Lawn

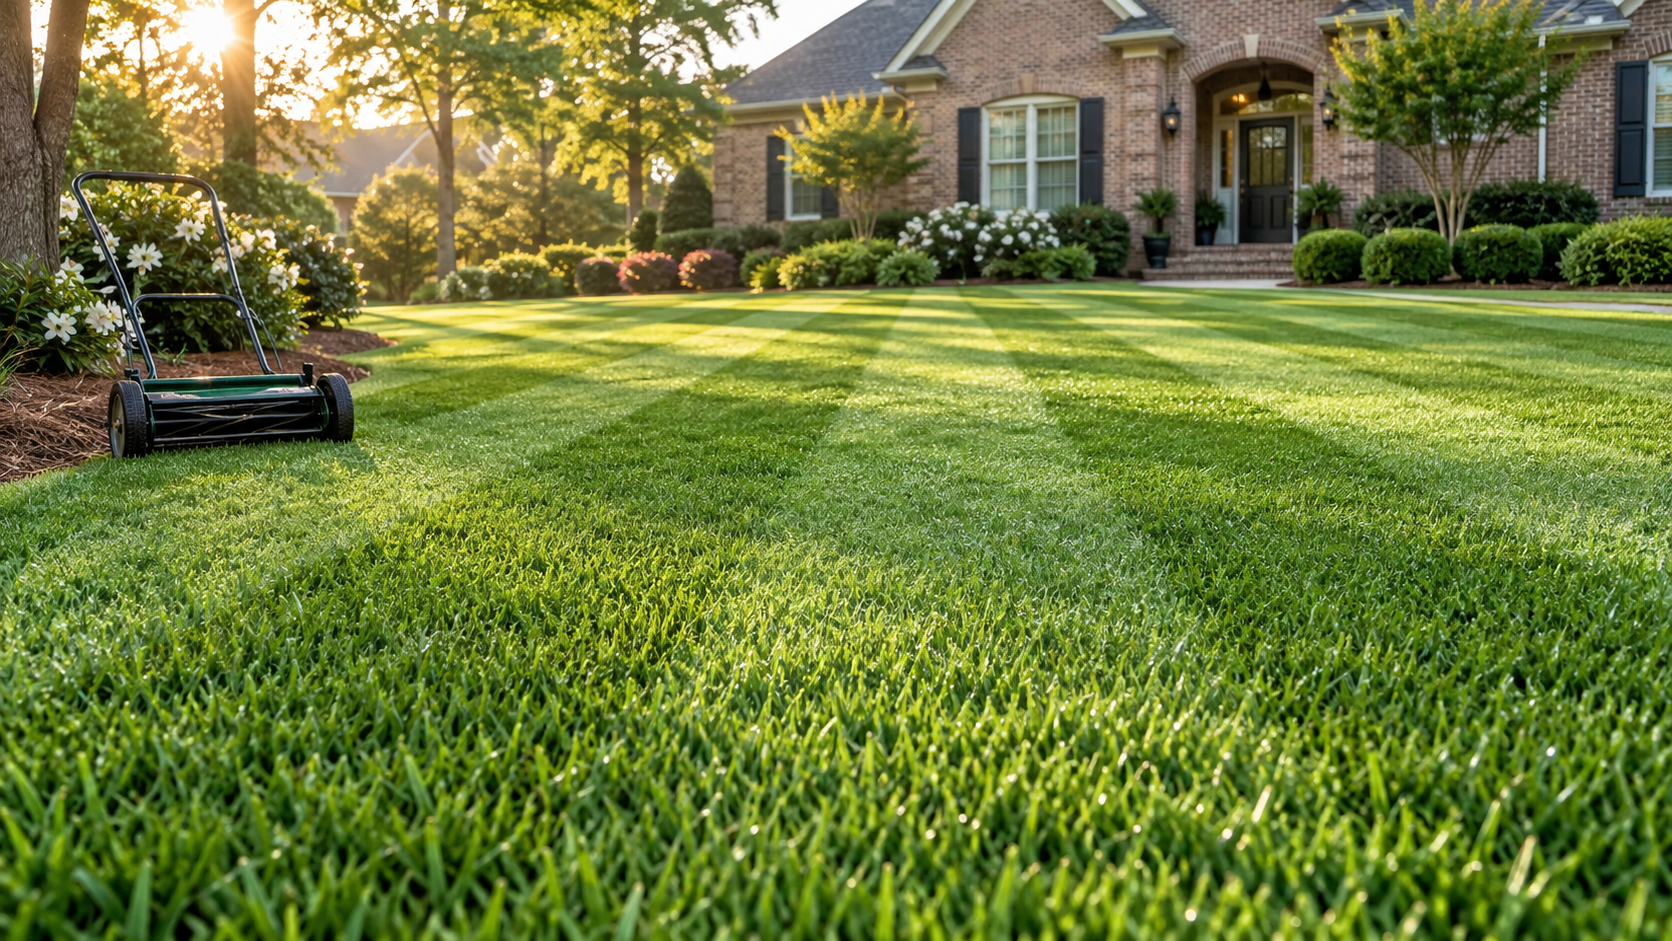
Lush, well-maintained green lawn with distinct mowing stripes leading to a residential home.

A practical season-by-season guide to weed control, mowing, watering, fertilizer, pest management, dethatching, biostimulants, and plant growth regulators.

By Ryan Marks | LandscapeMarks™

Affiliate disclosure: This article contains Andersons affiliate links. If you purchase through these links, LandscapeMarks may earn a commission at no additional cost to you.

The Bermuda Lawn System

A thick, dark-green Bermuda lawn does not come from one fertilizer application, one weed-control product, or one perfect mowing. It comes from a system.

Each part of that system supports the others. Pre-emergent reduces future weed pressure. Post-emergent cleans up weeds that escape. Mowing encourages density. Nitrogen fuels growth. Irrigation keeps the plant functioning. Seasonal cultivation prevents an overly thick canopy from becoming soft and spongy.

That is the part many homeowners miss. They shop for a single product that will make their lawn green, but Bermuda responds best when the basics are performed in the correct order and at the correct time.

The goal of this guide is to explain that order in plain language. It is written for warm-season Bermuda lawns in the Southeast, with Northern Alabama conditions in mind, but the same principles apply across much of the transition zone and warm-season turf region.

Local weather, soil conditions, Bermuda cultivar, irrigation coverage, and product labels should always guide your final decisions.

Bermuda is aggressive when it receives sunlight, warmth, nitrogen, water, and frequent mowing. It spreads through stolons above the soil and rhizomes below it. That growth habit is why Bermuda can recover from damage and form such a tight surface.

It is also why Bermuda can develop excessive thatch or a puffy canopy if growth is pushed without enough mowing and cultivation.

The best-looking lawn is not simply the lawn receiving the most products. It is the lawn where growth and maintenance stay in balance.

Start With the Conditions Bermuda Needs

Before building a product schedule, make sure your Bermuda is growing in a place where it can succeed.

Bermuda prefers full sun. Areas receiving heavy shade may remain thin no matter how much fertilizer is applied.

Poor drainage, compacted clay, uneven irrigation, disease, dull mower blades, and mowing too high or too infrequently can also create weak areas that weeds will eventually exploit.

A soil test is the best starting point for making decisions about lime, phosphorus, potassium, and soil pH. Nitrogen is normally added during active growth, but the other nutrients should not be guessed.

A soil test can prevent unnecessary applications and identify a pH problem that keeps the plant from using nutrients efficiently. In Alabama, a soil test through the Extension system is inexpensive compared with repeatedly purchasing products that may not address the actual limitation.

Walk your property and map the lawn before the growing season begins. Make note of:

  • Sunny and shaded sections
  • Slopes and drainage patterns
  • Compacted traffic areas
  • Sprinkler coverage gaps
  • High and low spots
  • Recurring weed problems
  • Areas that have experienced insect damage
  • Places that repeatedly scalp during mowing

A uniform calendar can be helpful, but a lawn rarely behaves uniformly.

Good lawn care is partly about following a schedule and partly about observing how your individual lawn responds.

The Annual Bermuda Lawn Calendar

Late Winter

The primary goal during late winter is preventing spring weeds.

This is the time to review your soil-test results, prepare your equipment, and apply a spring pre-emergent when local soil temperatures enter the appropriate product window.

Early Spring Green-Up

The goal during early spring green-up is to clean and prepare the lawn.

Complete your first low mow or spring scalp, remove dormant material and debris, and use a selective post-emergent if appropriate.

Wait until the Bermuda is actively growing before performing aggressive cultivation.

Late Spring

Late spring is the time to begin building density.

Start your regular nitrogen program, increase your mowing frequency, inspect irrigation coverage, and perform cultivation projects after the Bermuda is growing strongly enough to recover.

Summer

The primary summer goal is maintaining performance.

That includes frequent mowing, measured irrigation, nitrogen as needed, and regular scouting for insects, diseases, weeds, and excessive canopy development.

Late Summer and Early Fall

During late summer and early fall, focus on protecting and stabilizing the lawn.

Scout for armyworms and other seasonal pests. Perform corrective verticutting only if the lawn is healthy and has enough warm weather remaining to recover.

Apply your fall pre-emergent during the proper soil-temperature window.

Late Fall and Winter

Avoid unnecessary stress as Bermuda growth slows.

Reduce fertilizer and other inputs, remove leaves from the lawn, service your equipment, and begin planning for the next growing season.

Pre-Emergent Weed Control

Pre-emergent herbicide is the foundation of a clean Bermuda lawn because it stops many annual weeds during germination.

It does not create an invisible shield that kills every weed, and it does not remove mature weeds that are already growing.

Its job is to reduce the number of new weed seedlings that become established in the lawn.

For homeowners who prefer a granular application, The Andersons Barricade is a prodiamine pre-emergent option designed to prevent labeled grassy and broadleaf weeds before they germinate.

Apply it within the correct seasonal window, use the labeled rate for your lawn size, and follow the watering-in instructions printed on the current bag.

Spring Pre-Emergent Timing

For spring annual weeds such as crabgrass, apply a labeled pre-emergent before germination.

Many lawn programs use a soil-temperature trend near 55 degrees Fahrenheit as a planning signal. However, the product label, local Extension guidance, and recent weather matter more than a single reading taken on one afternoon.

The soil must be warming consistently, and the application needs to be in place before the germination window passes.

In Northern Alabama, that often means watching conditions from late winter through early spring instead of selecting the same calendar date every year.

Fall Pre-Emergent Timing

Fall pre-emergent targets cool-season annual weeds such as annual bluegrass and certain winter broadleaf weeds.

A practical planning trigger is when soil temperatures are consistently trending downward through approximately 70 degrees Fahrenheit, before those weeds begin germinating.

In Northern Alabama, this frequently happens during late summer or early fall, but summer heat can linger. Watch the temperature trend and follow the product label.

Some programs use split applications to extend coverage. That can be effective only when the product label permits it and the total annual amount remains within the label maximum.

After application, many granular pre-emergents require irrigation to move the active ingredient into the soil. The exact watering requirement is found on the product label.

There is also an important tradeoff to understand. Pre-emergent herbicides can interfere with desirable seed germination and root establishment.

Do not assume a pre-emergent is compatible with seeding, sprigging, plugging, or newly installed sod.

If you plan to overseed your Bermuda with perennial ryegrass, read the specific pre-emergent label well in advance. Your fall pre-emergent program may conflict with your overseeding plans.

Post-Emergent Weed Control

Post-emergent herbicide controls weeds that are already present.

The first step is properly identifying the weed. Sedges, grassy weeds, and broadleaf weeds require different chemistry. A product that controls one group may have little or no effect on another.

Photograph the entire plant, including:

  • The stem
  • Leaf arrangement
  • Seedhead
  • Growth pattern
  • Connection to the soil
  • How it spreads through the lawn

Extension identification resources are more dependable than guessing based on color alone.

One granular option for labeled broadleaf weeds is The Andersons Surge Weed and Feed 16-0-9.

Surge is a post-emergent weed-and-feed product. It is intended to control existing labeled weeds while also supplying fertilizer.

It does not replace a pre-emergent application and will not prevent future weeds from germinating.

Confirm that the label is appropriate for your Bermuda lawn, target weeds, temperature, and current fertilizer schedule before applying it.

Treat weeds while they are young and actively growing. Mature or drought-stressed weeds are usually more difficult to control.

Avoid applying post-emergent herbicides during temperature extremes unless the product label specifically allows it. Both weed control and turf safety can suffer when products are applied under the wrong conditions.

Use a product labeled for Bermuda grass and for the specific weed you are treating. Observe all mowing and watering restrictions and keep people and pets out of the treated area for the interval stated on the label.

A post-emergent application is not a substitute for correcting the reason weeds appeared.

Thin Bermuda caused by shade, compaction, poor mowing, scalping, irrigation failure, or nutrient imbalance will continue inviting weeds.

Kill the weed, but then repair the opening in the turf canopy.

Spring Cleanup Scarifying and Dethatching

The words scarifying, dethatching, and verticutting are sometimes used interchangeably, but the machines and intensity can differ.

The purpose is to open the canopy, remove or disrupt dead organic material, improve surface contact, and help Bermuda produce a tighter stand.

This is not the same as core aeration. Core aeration removes soil plugs to relieve compaction and improve the movement of air, water, and nutrients into the soil.

A light spring scalp or low mow removes dormant leaf material and allows sunlight to warm the soil.

Collect the heavy debris so it does not smother new growth.

More aggressive dethatching or verticutting should normally wait until the Bermuda is actively growing and has enough warm weather ahead to recover.

Cultivating weak or barely green turf can delay recovery and invite additional weed pressure.

When the Mower Starts Floating

Very dense Bermuda can develop a thick, puffy mat during the summer.

The mower begins riding on top of the canopy instead of holding a consistent cutting height. The lawn may look uneven even when the mower setting has not changed.

This is often described as the mower floating.

Other warning signs can include:

  • Excessive clippings
  • Footprints that remain visible
  • Repeated scalping on high spots
  • An inconsistent mowing height
  • A soft or spongy feeling under your feet
  • Stems sitting above the soil in a thick organic layer

A corrective verticut or dethatch may be useful during active summer growth, especially on an intensely managed, low-cut Bermuda lawn.

Time the work when the turf is healthy, properly hydrated, and capable of recovering.

Avoid doing it immediately before extreme heat, drought, travel, or the approach of fall dormancy.

Do not stack every stressful lawn practice on the same day.

Heavy cultivation, a major height reduction, a strong post-emergent herbicide, and a plant growth regulator applied together can overwhelm the lawn.

After cultivation, remove the debris, return the mower to a realistic height, irrigate appropriately, and provide light nutrition if the soil conditions and current fertilizer schedule support it.

Topdressing with clean, compatible sand can smooth minor imperfections and help dilute the organic layer.

However, deep low spots should be corrected gradually so the grass is not buried under too much sand at one time.

Nitrogen for Color and Density

Nitrogen is the engine of Bermuda growth.

It deepens color, increases leaf production, speeds recovery, and helps the plant close thin areas.

Nitrogen is also easy to overuse.

Too much nitrogen can create:

  • Excessive vertical growth
  • Heavy clipping production
  • Scalping
  • Increased thatch
  • Greater water demand
  • A soft or puffy canopy
  • Increased susceptibility to certain diseases or insects

Apply nitrogen only after the Bermuda is actively growing and the danger of a late freeze has passed.

Continue through the active growing season in measured amounts based on lawn response, soil conditions, product type, and local recommendations.

Many maintained Bermuda programs supply nitrogen at intervals during late spring and summer, but there is no universal bag rate or monthly formula that fits every yard.

Calculate pounds of actual nitrogen per 1,000 square feet and keep an annual application log.

How to Calculate Actual Nitrogen

The three numbers on a fertilizer bag represent the percentages of nitrogen, phosphate, and potash.

For example, 46-0-0 urea contains 46 percent nitrogen.

To apply one-half pound of actual nitrogen per 1,000 square feet, divide 0.5 by 0.46.

The result is approximately 1.09 pounds of 46-0-0 product per 1,000 square feet.

Perform the same calculation for any fertilizer analysis rather than copying someone else’s spreader setting.

A spreader setting is only a starting point. Walking speed, spreader condition, product particle size, and equipment calibration can all change the amount being applied.

Slow-release fertilizer generally produces a longer and steadier response. Soluble nitrogen can respond quickly but requires accurate measuring and even application.

Watering instructions vary by product. Calibrate your spreader or sprayer, make two lighter passes in different directions when appropriate, and blow fertilizer granules off driveways, sidewalks, and other hard surfaces.

Prevent fertilizer from entering storm drains, ponds, creeks, and other waterways.

Stop pushing lush growth as Bermuda begins slowing down in the fall.

Late-season nitrogen timing varies by region and weather, but the guiding principle is simple: do not force tender growth when the plant should be preparing for dormancy.

A soil-test recommendation may support an application of potassium, but a generic winterizer should not replace actual soil information.

Mowing Is the Most Important Repeated Practice

Fertilizer cannot compensate for poor mowing.

Each mowing changes how Bermuda grows. Frequent mowing encourages the plant to spread and maintain a fine, dense canopy.

Infrequent mowing removes too much green tissue at once and exposes the brown stems underneath.

Choose a Height You Can Maintain

Standard homeowner guidance often places common Bermuda at approximately 1 to 2 inches, depending on the cultivar and equipment.

A rotary mower works well in that range when its blade is sharp and the lawn is reasonably level.

Reel mowing can maintain Bermuda much lower, but a quarter-inch Bermuda lawn is an entirely different maintenance system.

It demands:

  • A level surface
  • A properly adjusted reel and bedknife
  • Frequent mowing
  • Tighter irrigation management
  • Accurate fertility
  • Quick responses when growth accelerates

Follow the one-third rule as a general guardrail. Avoid removing more than approximately one-third of the leaf blade during one mowing.

At a low height of cut, the amount of time between mowings becomes very short.

During peak growth, a reel-mowed lawn may require mowing every day or every other day. A higher-cut Bermuda lawn may be maintained several times per week.

Growth rate—not simply the day of the week—should determine your mowing schedule.

If the lawn gets too tall, lower it gradually across multiple mowings.

Cutting directly from an overgrown canopy to your preferred height will expose brown stems and may scalp uneven ground.

Alternate your mowing directions to reduce grain and uneven wear.

Keep the rotary blade or reel sharp, check the relationship between the reel and bedknife, and repair ruts or high spots that repeatedly scalp.

Clippings can normally remain on the lawn when they are short and evenly dispersed.

Grass clippings return nutrients to the soil and do not automatically create thatch.

Bag or collect clippings when they form piles, the lawn is wet, weeds are producing seeds, or a cultivation project creates heavy debris.

Water Deeply and Measure It

A healthy Bermuda lawn generally performs better with deep, infrequent irrigation than with a small amount of water every day.

The objective is to wet the active root zone and then allow the surface to begin drying before the next irrigation.

Frequent shallow watering encourages shallow roots and can support weeds and disease.

A common starting range during active summer growth is approximately 1 inch of total water per week from rainfall and irrigation.

The lawn may require more during extreme heat or on sandy soil and less on heavy clay.

Do not treat 1 inch as an automatic sprinkler setting.

Measure irrigation output using catch cups or straight-sided containers and adjust each zone individually.

Slopes and clay soil may require cycle-and-soak irrigation. This means dividing one irrigation event into shorter cycles so the water has time to soak into the soil instead of running down the driveway or into the street.

Water early in the morning, generally between approximately 6 and 10 a.m.

Avoid routine evening irrigation that leaves the grass wet for long periods.

Watch the lawn for signs of moisture stress, including:

  • A bluish-gray appearance
  • Folded or rolled leaves
  • Footprints that do not quickly disappear
  • Dry areas that appear in the same location repeatedly

A screwdriver pushed into the soil after irrigation can help confirm whether the moisture reached several inches into the ground.

Low-cut turf has less leaf tissue and a smaller margin for error, so it may show stress faster.

That does not automatically mean daily watering is correct.

Improve sprinkler distribution, check actual soil moisture, and adjust irrigation depth and frequency to match your property.

During periods of extreme heat stress, slightly raising the mowing height can increase the plant’s photosynthetic area and improve its resilience.

Insect Scouting and DuoCide

Armyworms, sod webworms, grubs, mole crickets, chinch bugs, and other pests can damage Bermuda.

However, brown grass alone does not prove that an insect problem is present.

Drought, scalping, dull mower blades, disease, fertilizer burn, pet urine, and irrigation gaps can create similar symptoms.

Scout before treating.

Look for:

  • Chewed grass blades
  • Birds feeding heavily in one area
  • Increased moth activity
  • Visible larvae
  • Turf that lifts easily from the soil
  • Damage expanding from a defined edge
  • Rapid thinning that cannot be explained by irrigation or mowing

Armyworm damage can progress quickly during late summer.

Inspect suspicious areas early and late in the day. Part the canopy and use a soap flush when recommended by Extension guidance to bring surface-feeding caterpillars into view.

If a damaging population is present, respond promptly with an appropriately labeled product.

The Andersons DuoCide is a broad-spectrum granular insecticide containing carbaryl and bifenthrin.

Its current labeling includes pests such as armyworms, cutworms, sod webworms, chinch bugs, mole crickets, and certain grubs.

DuoCide can be a useful tool when the pest, timing, site, and application directions match the label.

It should not be described as fertilizer, and a routine blanket insecticide application is not always necessary.

Read the current bag label before every application.

The label controls the application rate, watering instructions, retreatment interval, personal protection, environmental precautions, and reentry requirements.

Carbaryl and bifenthrin can affect non-target insects.

Keep granules away from flowers, hard surfaces, storm drains, ponds, and any other areas prohibited by the label.

If your property has a fishpond or turtle pond, protect that water carefully. Never allow insecticide granules, spray, runoff, or equipment rinse water to enter the pond.

Optional Biostimulant Support

A biostimulant can complement a sound Bermuda maintenance program, but it does not replace nitrogen, proper mowing, irrigation, weed control, or a soil test.

Biostimulants are used to support natural plant and soil processes.

Depending on the formulation, they may contain ingredients such as humic substances, kelp extracts, amino acids, or other components intended to support root and soil health.

One option is LandscapeMarks Emerald Boost Lawn Biostimulant Concentrate.

Emerald Boost is my LandscapeMarks product. It was designed for DIY lawn enthusiasts who want to support root and soil health as part of a complete lawn-care routine.

I suggest using Emerald Boost alongside the fundamentals discussed in this guide—not as a substitute for fertilizer or corrective lawn care.

A biostimulant should support your overall program rather than distract you from the basics.

Apply any biostimulant according to its label and evaluate the lawn’s response over time.

A healthy response still depends on sunlight, temperature, mowing, moisture, and appropriate nutrition.

Think of a biostimulant as support for the lawn’s foundation rather than a shortcut around it.

Optional Plant Growth Regulation With Governor G

A plant growth regulator is optional.

It does not replace mowing, fertilizer, water, or cultivation.

The Andersons Governor G is a granular turf growth regulator containing trinexapac-ethyl.

The manufacturer describes it as reducing vertical growth and clipping volume while promoting a denser and more durable appearance.

That can be useful for a frequently mowed Bermuda lawn because controlled vertical growth may help the canopy remain more uniform between cuts.

Many lawn enthusiasts also value the darker appearance and increased lateral-growth response they may observe.

Results depend on application accuracy, turf health, temperature, mowing height, and repeat timing.

Apply a plant growth regulator only to healthy, actively growing turf and follow the current product label.

Do not guess at the application rate or assume that applying more will create better regulation.

An excessive rate can cause discoloration or slow the lawn’s recovery.

Avoid applying a PGR immediately after severe scalping, aggressive dethatching, drought stress, herbicide injury, or another event from which the turf needs rapid growth to recover.

If cultivation is required, let the lawn’s recovery—not the desire to reduce mowing—determine when PGR applications resume.

How the Practices Work Together

The best Bermuda schedule avoids stacking too much stress on the lawn at one time.

Pre-emergent requires correct timing and activation.

Post-emergent works best on properly identified, actively growing weeds under weather conditions allowed by the label.

Dethatching and verticutting require favorable recovery conditions.

Nitrogen produces growth that must then be mowed.

A plant growth regulator reduces vertical growth but can also slow recovery.

Insecticide should match an actual or reasonably expected pest problem.

Irrigation supports all these practices, but it can also move products away from the target area if applied incorrectly.

Keep a simple lawn journal.

Record:

  • Application date
  • Product name
  • Active ingredient
  • Application rate
  • Treated square footage
  • Weather conditions
  • Soil temperature
  • Irrigation amount
  • Mowing height
  • Observed results

Photograph the same locations every week.

Within one growing season, that record can become more valuable than a generic calendar because it shows exactly how your lawn responds.

Common Mistakes That Keep Bermuda Thin or Brown

Avoid these common Bermuda lawn mistakes:

  • Applying fertilizer before active green-up and expecting dormant Bermuda to respond
  • Using pre-emergent after the primary germination window and expecting it to kill established weeds
  • Treating an unidentified weed with a product not labeled for that weed or for Bermuda
  • Removing too much leaf tissue during one mowing
  • Trying to maintain an extremely low cut without a level surface or frequent mowing
  • Watering a small amount every day instead of measuring output and wetting the root zone
  • Assuming every brown patch is caused by armyworms and applying insecticide without scouting
  • Using a plant growth regulator on stressed turf that needs unrestricted growth to recover
  • Aggressively dethatching when the Bermuda is not actively growing
  • Stacking scalping, herbicide, cultivation, fertilizer, insecticide, and PGR applications into one stressful weekend

A Practical Weekly Routine During Active Growth

A strong Bermuda program becomes easier to manage when it is divided into short inspections instead of occasional rescue projects.

Once or twice each week, walk the entire lawn before mowing.

Look for weeds, unusual seedheads, chewing damage, wilt, mushrooms, color changes, irrigation misses, and places where the mower is beginning to float.

Use this simple weekly checklist:

  • Mow according to the growth rate and remove no more than approximately one-third of the leaf blade.
  • Check the quality of the cut. Frayed or tan tips may indicate a dull rotary blade or a reel and bedknife that require adjustment.
  • Measure rainfall and irrigation instead of estimating based on sprinkler runtime.
  • Inspect high-risk areas for armyworms and other insects during their seasonal activity windows.
  • Spot-treat properly identified weeds when the label and weather allow instead of spraying the entire lawn unnecessarily.
  • Review your nitrogen and PGR records before making another application.
  • Photograph repeat locations so changes in density, color, and overall health are easy to compare.

Final Thoughts

A green, thick, healthy Bermuda lawn is built through consistency.

Pre-emergent prevents many problems before they appear.

Post-emergent addresses the weeds that escape.

Spring cleanup and properly timed cultivation keep the surface open and manageable.

Nitrogen powers growth, but mowing shapes that growth into density.

Water keeps the system functioning.

Insect scouting protects the investment.

A biostimulant can support the lawn’s root and soil foundation.

A plant growth regulator can refine the appearance once the fundamentals are working properly.

The order matters.

Diagnose the problem first, choose the practice that addresses it, confirm the product label, and give the lawn enough time to respond.

Bermuda is resilient, but it performs best when every product and maintenance practice has a specific purpose.

Build the foundation, maintain accurate records, and make small corrections before they become large repairs.

That is how an ordinary warm-season yard becomes the kind of Bermuda lawn that stays dense, uniform, and green throughout the heart of the growing season.

Sources and Safety

This article is provided for educational purposes.

Pesticide and plant-growth-regulator labels are legal directions and can change. Always read and follow the current container label, confirm that the product is registered for your state and application site, wear the required protective equipment, and follow all environmental and reentry precautions.

Additional guidance and product information:

Posted on — Leave a comment

Best Lawn Biostimulants for 2026: What to Look For

Healthy lawn roots representing the best lawn biostimulants for 2026

A healthy, attractive lawn requires more than simply applying fertilizer. Fertilizer supplies essential nutrients, but your grass must still be able to use those nutrients efficiently while dealing with heat, drought, mowing and other environmental stresses.

That is where lawn biostimulants can help.

The best lawn biostimulants are designed to support the natural processes occurring within the grass and soil. Depending on their ingredients, they may support root development, nutrient availability, soil health, stress tolerance and overall turf quality.

However, not every product labeled as a lawn biostimulant contains the same ingredients or serves the same purpose. Some products focus primarily on humic acid. Others contain sea kelp, amino acids, fulvic acid, yucca or micronutrients. There are also all-in-one concentrates that combine several of these ingredients in a single application.

This guide explains what lawn biostimulants do, which ingredients you should look for and how to choose the best lawn biostimulant for your lawn.

Disclosure: LandscapeMarks™ produces Emerald Boost™ Lawn Biostimulant Concentrate, one of the products discussed in this guide. Our goal is to explain the differences between common biostimulant options so you can make an informed decision for your lawn.

What Is a Lawn Biostimulant?

A lawn biostimulant is a product intended to support the natural biological and physiological processes of turfgrass.

You may also see lawn biostimulant written as “lawn bio-stimulant” or “lawn bio stimulant.” These terms are commonly used to describe the same general category of lawn-care products.

Unlike a traditional fertilizer, a biostimulant is not primarily used to provide large amounts of nitrogen, phosphorus or potassium. Instead, it works alongside a responsible lawn-care program that may include fertilization, mowing, irrigation, aeration and soil management.

Depending on the formulation, a lawn biostimulant may help support:

  • Root development
  • Nutrient availability and uptake
  • Soil structure
  • Microbial activity
  • Plant response to environmental stress
  • Moisture management
  • Chlorophyll production and turf color
  • Recovery following periods of stress

Biostimulants should not be viewed as miracle products. They cannot correct every soil problem, replace proper watering or compensate for mowing mistakes. Their greatest value comes from supporting an already balanced lawn-care program.

What Is the Difference Between a Biostimulant and Fertilizer?

Fertilizers and biostimulants perform different but complementary roles.

Fertilizer supplies nutrients such as nitrogen, phosphorus and potassium. These nutrients directly contribute to plant growth, root development and other essential functions.

A biostimulant is designed to help support the processes that allow the plant and soil to function more effectively. For example, humic substances may support soil and nutrient interactions, while sea kelp and amino acids may support plant development and stress response.

“Fertilizer feeds the lawn with essential nutrients. A biostimulant supports the system that uses those nutrients.”

For many lawns, the best approach is not choosing one or the other. It is using each product for its intended purpose as part of a complete lawn-care program.

What Makes a Good Lawn Biostimulant?

The best lawn biostimulant depends on your grass type, soil conditions and primary lawn-care goal. However, several commonly used ingredients can help you evaluate a product.

Sea Kelp

Sea kelp is one of the most widely recognized biostimulant ingredients. Kelp extracts contain naturally occurring compounds associated with plant development and stress response.

In a turf program, sea kelp is commonly used to support:

  • Root development
  • Turf vigor
  • Recovery from environmental stress
  • Overall plant health

Kelp-based products are especially popular during periods when lawns may experience summer heat, drought or recovery stress.

Humic Acid

Humic acid is derived from decomposed organic material. It is frequently used in soil-health programs because of its interaction with soil particles and nutrients.

Humic acid may help support:

  • Soil structure
  • Nutrient availability
  • Root-zone conditions
  • More efficient use of an existing fertility program

Humic acid is not a substitute for fertilizer, but it can complement fertilizer and responsible soil management.

Fulvic Acid

Fulvic acid is another humic substance, but its smaller molecular structure makes it highly mobile in soil and water.

It is commonly included in liquid biostimulant products to support nutrient movement and availability. When paired with humic acid, fulvic acid can contribute to a more complete soil-and-plant support program.

Amino Acids

Amino acids are fundamental components involved in plant growth and metabolism. Plants can produce their own amino acids, but supplemental amino-acid products are often used as part of programs intended to support turf during demanding conditions.

Amino acids may be especially useful when the lawn is facing:

  • High temperatures
  • Drought stress
  • Frequent mowing
  • Recovery from seasonal stress
  • Other challenging growing conditions

They should be used proactively as part of good turf management, not as a treatment for disease or pest damage.

Yucca Extract

Yucca extract is frequently used in lawn products for its surfactant-like characteristics. It can help water spread more evenly through the application area and may support better moisture distribution in the soil.

Yucca does not replace proper irrigation. However, it can be a valuable component in a product designed to support the soil and root zone.

Chelated Iron

Iron supports chlorophyll production and can help improve the lawn’s green appearance without relying entirely on additional nitrogen.

Chelated iron is formulated to help keep the iron available to the plant. Results can vary based on soil pH, grass type, application rate and environmental conditions.

Iron should always be applied according to the product label. Excessive application can discolor turf and stain concrete, stone or other hard surfaces.

Comparing the Main Types of Lawn Biostimulants

There is no single product that is automatically best for every lawn. The right choice depends on what you want the product to accomplish.

Biostimulant Type Best For Potential Limitation
Single-Ingredient Humic Products
A concentrated humic-acid product for soil conditioning and nutrient availability.
Lawn enthusiasts who want to build a customized soil-health program. Multiple separate products may be required to obtain a broader combination of ingredients.
Sea-Kelp and Root-Growth Products
Marketed toward root development, turf vigor and support during environmental stress.
Lawn owners who primarily want kelp-based root and stress support. A kelp-focused product may not contain humic acid, fulvic acid, amino acids, yucca or iron.
Granular Biostimulants
Applied with a broadcast spreader; convenient for those who do not want liquid sprayers.
Homeowners who prefer using a spreader rather than mixing and spraying liquids. Granular products may take longer to disperse and normally require irrigation after application.
All-in-One Liquid Concentrates
Combines several supporting ingredients in one bottle to reduce measuring separate products.
DIY lawn owners who want a convenient, broad-spectrum biostimulant program. An all-in-one product provides less ability to independently adjust each ingredient.

Emerald Boost™: An All-in-One Lawn Biostimulant Concentrate

LandscapeMarks™ Emerald Boost™ Lawn Biostimulant Concentrate was created for DIY lawn enthusiasts who want several commonly used biostimulant ingredients in one convenient application.

Its formula brings together:

  • Sea kelp
  • Humic acid
  • Fulvic acid
  • Amino acids
  • Yucca extract
  • Chelated iron

Rather than requiring several separate bottles, Emerald Boost™ provides an all-in-one concentrate designed to support roots, soil health, nutrient use, stress resilience and turf color.

Emerald Boost™ is not a fertilizer and is not intended to replace a complete fertilization program. It is designed to complement responsible mowing, watering, fertilization and soil management.

Who Is Emerald Boost™ Best For?

Emerald Boost™ may be a good choice for homeowners who:

  • Want an all-in-one liquid lawn biostimulant
  • Prefer not to purchase several separate products
  • Want to support both the plant and the soil
  • Maintain Bermuda, Zoysia, St. Augustine or Fescue
  • Want to complement an existing fertilizer program
  • Regularly manage lawns exposed to heat or other environmental stress
  • Prefer applying lawn products with a pump, battery-powered or backpack sprayer

How to Apply Emerald Boost™

Mix one 8-fluid-ounce bottle of Emerald Boost™ with up to four gallons of water and apply the mixture evenly over the intended lawn area.

The water acts as a carrier that helps distribute the concentrate evenly. Always follow the current product label and avoid applying more product simply because you want faster results.

For best performance:

  • Apply the product evenly.
  • Avoid applying during the hottest part of the day.
  • Do not apply to severely drought-stressed turf.
  • Maintain appropriate irrigation for your grass type.
  • Continue following a balanced mowing and fertility program.
  • Keep the spray away from concrete and other hard surfaces because products containing iron may cause staining.

Application conditions, soil characteristics and grass type can all affect results.

Want a more detailed explanation of the ingredients, application process and expected results? Read our complete guide to Emerald Boost™ Lawn Biostimulant.

👉 Learn more about Emerald Boost™ Lawn Biostimulant Concentrate

What Is the Best Lawn Biostimulant for Bermuda Grass?

Bermuda grass responds well to consistent mowing, appropriate nitrogen, adequate sunlight and responsible irrigation. A biostimulant can complement those fundamentals, especially when the lawn is maintained at a low height of cut or exposed to intense summer conditions.

For Bermuda grass, consider a biostimulant containing a combination of:

  • Sea kelp for root and stress support
  • Humic and fulvic acids for soil and nutrient support
  • Amino acids for plant metabolic support
  • Yucca for moisture distribution
  • Iron for chlorophyll production and color

An all-in-one product can be particularly convenient for homeowners maintaining a high-quality Bermuda lawn because it simplifies the application program.

However, no biostimulant can overcome excessive shade, poor drainage, severe compaction, improper mowing or an unbalanced fertility program. Address those underlying conditions first.

What Results Should You Expect?

Biostimulants generally work differently from high-nitrogen fertilizers. You may not see a dramatic growth response immediately after application.

Depending on the product and conditions, you may notice:

  • Improved color
  • A healthier overall appearance
  • Better turf response during active growth
  • Support during periods of environmental stress
  • Gradual improvement in the root-zone environment

Root and soil improvements are not always immediately visible from above the lawn. Some benefits develop over time through repeated use and consistent lawn management.

Results will depend on:

  • Grass species
  • Soil pH and composition
  • Current nutrient levels
  • Irrigation practices
  • Mowing height and frequency
  • Weather conditions
  • Application rate
  • Existing turf health

Take photographs before application and compare the same area under similar lighting after seven, 14 and 30 days. This provides a more reliable comparison than relying on memory.

When Should You Apply a Lawn Biostimulant?

The best time to apply a biostimulant is usually when the grass is actively growing and able to respond to the application.

For warm-season grasses such as Bermuda, Zoysia and St. Augustine, this generally means the active growing season after spring green-up and before dormancy.

For cool-season grasses such as Fescue, applications are commonly timed around active spring and fall growth while avoiding extreme summer stress.

Biostimulants are often most useful when applied proactively:

  • During active seasonal growth
  • Before anticipated summer stress
  • Following aeration
  • As part of recovery from routine lawn stress
  • Alongside a balanced fertilizer program
  • During establishment or overseeding when permitted by the label

Avoid applying lawn products to dormant, frozen, flooded or severely stressed turf unless the label specifically recommends it.

Can You Apply a Biostimulant With Fertilizer?

Many biostimulants are designed to complement fertilizer, but that does not automatically mean every product can be mixed in the same sprayer tank.

Before mixing products:

  1. Read both labels completely.
  2. Confirm that the products are compatible.
  3. Perform a small jar test when appropriate.
  4. Avoid combining products if either label prohibits it.

When uncertain, apply them separately. Applying products separately may require more time, but it reduces the possibility of an unwanted reaction or uneven application.

Are Lawn Biostimulants Worth It?

A lawn biostimulant can be worthwhile when it is used for the right reasons.

It makes the most sense for homeowners who already follow the fundamentals and want additional support for the plant-and-soil system. It is less likely to provide meaningful results when major lawn problems remain unresolved.

Before purchasing a biostimulant, make sure you are also addressing:

  • Correct mowing height
  • Sharp mower blades
  • Proper watering
  • Soil drainage
  • Adequate sunlight
  • Appropriate fertilization
  • Soil pH
  • Weed, disease and insect problems

Think of a biostimulant as a supporting member of your lawn-care program—not a replacement for the program itself.

How to Choose the Best Lawn Biostimulant

Before purchasing, ask these questions:

  • What specific lawn problem or goal am I addressing?
  • Does the label clearly identify the product’s ingredients?
  • Is the product intended for my grass type?
  • Are the application instructions clear?
  • Do I want one targeted ingredient or an all-in-one formula?
  • Do I prefer a liquid spray or granular application?
  • Does the company provide accessible product information and safety documentation?
  • Are the claims realistic and supported by the ingredients and directions?

Avoid products that promise overnight soil transformation, permanent drought resistance or perfect turf without proper maintenance.

Frequently Asked Questions

Is a lawn biostimulant the same as fertilizer?

No. Fertilizer supplies essential plant nutrients, while a biostimulant supports natural plant or soil processes. Biostimulants are generally intended to complement, not replace, an appropriate fertility program.

Will a biostimulant make my lawn greener?

Some products contain iron or other ingredients that support chlorophyll production and turf color. The final result depends on grass type, soil conditions, nutrient levels, weather and application rate.

Can a biostimulant repair a dead lawn?

A biostimulant cannot bring dead grass back to life. It may support living turf during recovery, but dead areas may require correcting the underlying problem and then reseeding, sprigging, plugging or installing sod.

Can biostimulants prevent lawn disease?

Biostimulants should not be treated as fungicides, insecticides or herbicides. Diagnose suspected disease or pest problems correctly and use an appropriately labeled control product when necessary.

Can I use a biostimulant during summer?

Yes, depending on the product label and the condition of the lawn. Avoid applying products to severely drought-stressed turf or during the hottest part of the day. Maintain appropriate irrigation and follow all label directions.

How quickly do lawn biostimulants work?

The timeline varies. Color changes from iron may become visible sooner than improvements related to roots or soil conditions. Evaluate the lawn over several weeks rather than expecting an overnight transformation.

What is the best lawn biostimulant for beginners?

A clearly labeled all-in-one concentrate may be the easiest place to start because it eliminates the need to select and measure several separate products. More experienced lawn enthusiasts may prefer individual products that allow precise control over each ingredient.

Final Thoughts

The best lawn biostimulant is not necessarily the product with the longest ingredient list or the biggest promises. It is the product that fits your lawn’s needs, provides clear application instructions and works alongside sound turf-management practices.

A humic-acid product may be ideal for someone concentrating on soil management. A kelp-based product may fit a program focused on roots and environmental stress. A granular option may be best for someone who prefers using a broadcast spreader. An all-in-one liquid concentrate may be the most convenient choice for homeowners seeking several types of support in one application.

LandscapeMarks™ Emerald Boost™ combines kelp, humic acid, fulvic acid, amino acids, yucca and chelated iron in an all-in-one concentrate created for DIY lawn enthusiasts.

It is designed to support stronger lawn fundamentals—not replace them.

For additional product information, application instructions and availability, visit the Emerald Boost™ Lawn Biostimulant Concentrate product page.

Posted on — Leave a comment

Emerald Boost™ Lawn Biostimulant: What It Does, How to Apply It & What to Expect

Emerald Boost liquid lawn biostimulant concentrate bottle on a dark background.

🌿 Emerald Boost™ Lawn Biostimulant

Deep Green. Naturally.

Emerald Boost™ is a concentrated lawn biostimulant designed to support the foundation of turf health: the roots and the soil. It complements your existing lawn‑care program by improving nutrient efficiency, supporting natural plant processes, and helping create deeper, richer color without forcing excessive top growth.


⭐ Why Your Lawn Needs More Than Fertilizer

Most homeowners chase green color by applying more nitrogen. But the real magic of a beautiful lawn happens below the surface. Healthy turf depends on:

  • 🌱 Strong roots
  • 🪨 Balanced soil
  • 💧 Proper moisture movement
  • ⚡ Efficient nutrient use
  • 🌤️ A stable growing environment

Emerald Boost™ supports that system — the part you don’t see but absolutely rely on.


🧪 What Is Emerald Boost™?

Emerald Boost™ is an 8 fl oz concentrated biostimulant formulated to complement fertilizer, mowing, watering, and soil management.

Mixing Ratio:
One bottle makes up to 4 gallons of spray solution. Apply evenly using a pump, backpack, or battery sprayer. Always follow the product label.


🔬 What’s Inside Emerald Boost™ (and Why It Matters)

🌿 Kelp
Supports natural plant processes and overall vigor.

🟫 Humic Acid
Improves soil structure, moisture retention, and nutrient interaction.

⚡ Fulvic Components
Enhance nutrient availability and movement within the plant.

🧬 Amino Acids
Provide building blocks for growth and stress tolerance.

🌵 Yucca
Helps water penetrate soil more effectively.

🟩 Chelated Iron
Contributes to deeper natural color without forcing excessive growth.


📊 Biostimulant vs Fertilizer

Biostimulant Fertilizer
Supports soil & root processes Provides essential nutrients
Improves long-term turf resilience Drives immediate top growth
Complements a full lawn program Essential but incomplete alone

🌱 Why Root Health Matters

Your lawn faces heat, drought, heavy rain, foot traffic, mowing stress, compaction, insects, and disease. A strong root system is what allows turf to survive and recover.

A beautiful lawn isn’t built from the top down — it’s built from the ground up.


🧰 How to Apply Emerald Boost™

  1. 🧼 Start with a clean sprayer
  2. 💧 Add water first
  3. 🧪 Add Emerald Boost™
  4. 💧 Add remaining water
  5. 🔄 Agitate gently
  6. 🚶 Apply evenly
  7. 🔁 Re‑agitate occasionally

🎯 Sprayer Calibration

Even coverage creates predictable results.

Spray a measured area using plain water, measure how much was used, and you’ll know your sprayer’s output per 1,000 sq ft.


📅 When to Apply

  • 🔥 Warm‑season grasses: late spring through summer
  • 🍂 Cool‑season grasses: spring and fall

Consistency matters more than frequency.


🌾 Grass Types That Benefit

  • 🌿 Bermuda
  • 🌱 Zoysia
  • 🌴 St. Augustine
  • 🍃 Fescue

🔍 What Results to Expect

Supports:

  • 🌱 Root development
  • 🪨 Soil condition
  • 🌿 Turf density
  • ⚡ Nutrient efficiency
  • 🔄 Recovery
  • 💪 Overall vigor

Cannot fix alone:

  • 🧱 Severe compaction
  • 🚫 Poor irrigation
  • 🌑 Lack of sunlight
  • 🐛 Insect damage
  • 🦠 Active disease
  • ✂️ Incorrect mowing
  • ⚠️ Major nutrient deficiencies

📸 Tracking Your Results

Take photos before your first application, from the same angle, at the same time of day. Pull a soil plug occasionally to inspect root development — the real story is underground.


🟩 Emerald Boost™ + Bermuda Grass

Bermuda responds extremely well to frequent mowing, proper irrigation, balanced fertility, soil management, and root‑zone support. Emerald Boost™ fits naturally into a Bermuda program focused on density, color, and recovery.


🌱 Ready to support stronger roots, healthier soil, and a more resilient lawn?

Try LandscapeMarks™ Emerald Boost™ lawn biostimulant concentrate as part of your complete lawn-care program.

Shop Emerald Boost™ →


🧪 Should You Use Emerald Boost™ With Fertilizer?

Yes. Emerald Boost™ complements fertilizer. It does not replace it.

Fertility + Mowing + Irrigation + Soil Management + Root Support = Complete Lawn Care.


🧪 Soil Testing

A soil test reveals pH, nutrient levels, and hidden limitations. This prevents wasted money and misdiagnosed problems.


💧 Watering Still Matters

No biostimulant replaces proper irrigation. Water deeply, not daily.


✂️ Mowing Still Matters

Sharp blades. Correct height. Consistent frequency. Avoid removing more than one‑third of the blade.


🧱 Emerald Boost™ Isn’t a Shortcut — It’s a System

It’s not fertilizer, herbicide, insecticide, fungicide, or a cure for poor mowing or watering. It’s a support product for homeowners who want a complete lawn‑care strategy.


🏡 Who Emerald Boost™ Is For

  • 🏠 DIY homeowners
  • 🎥 Reel‑mowing enthusiasts
  • 🔥 Bermuda fanatics
  • 📚 Lawn‑care learners
  • 🔬 Anyone wanting deeper turf understanding
  • 💡 Anyone tired of “just throw fertilizer at it”

❓ Frequently Asked Questions

Is it a fertilizer?
No — it complements fertilizer.

How much water do I mix with it?
Up to 4 gallons per bottle.

Will it make my lawn green?
It contains iron, but the goal is overall turf quality.

Can it fix a damaged lawn?
Only if the underlying issue is addressed.

Do I need professional equipment?
No — any calibrated sprayer works.


🛒 Ready to Build Your Lawn From the Ground Up?

LandscapeMarks™ Emerald Boost™ Lawn Biostimulant Concentrate
Support the roots. Support the soil. Build a better lawn.

BUY IT NOW


🌿 Final Takeaway

A truly beautiful lawn isn’t built only from the top down. It’s built from the ground up.

Emerald Boost™ helps you build the foundation.

Posted on — Leave a comment

How to Maximize Your Bermuda Grass in the Summer

There’s something special about stepping onto your lawn in the summer and seeing that perfect, deep green Bermuda grass — dense, soft, and striped like a fairway at Augusta. For DIY dads who take pride in their turf, summer is game time. But thriving Bermuda grass doesn’t happen by accident. It takes smart planning, timing, the right tools, and a bit of grit.

In this guide, we’ll walk you through how to maximize your Bermuda grass lawn during the summer — from mowing strategy to fertilization, watering, weed control, and pro-level tips most homeowners overlook.

Why Summer Is Bermuda Grass Season

Bermuda grass loves heat. It thrives when the temps are between 85°F and 100°F. That’s why summer is its growing season — when it can explode with growth if you give it what it needs.

But here’s the catch: summer can also stress your turf with heat, drought, pests, and overuse. That means you need a summer lawn game plan built for performance, resilience, and looks.

Supporting strong roots and healthy soil is another important part of summer Bermuda care. Applying a liquid lawn biostimulant like Emerald Boost™ is designed to support root development, soil health, turf resilience, and rich green color as part of a complete Bermuda lawn-care program.

1. Mowing: The Secret to That Tight, Carpet-Like Look

Most DIY dads mow too high. Bermuda grass is a low-mow turf — and mowing short (but often) is the key to making it look like a golf green.

Mowing Rules for Bermuda Grass in Summer:

  • Height: Mow at 0.5” to 1.5” (Reel mower preferred for <1”)
  • Frequency: Every 2–3 days
  • Rule of Thirds: Never cut more than 1/3 of the blade at once
  • Clippings: Use a mulching mower or bag thick clippings

Pro Tip: Want those beautiful lawn stripes? Invest in a reel mower like a McLane or a Reel Roller’s Revolution model — it slices instead of tears for that golf-course look. (Curious why some people mow constantly? Here is why cutting Bermuda grass every two days makes sense.)

2. Watering: Deep, Infrequent, and Early

Bermuda roots love deep watering — but only when needed. Daily watering weakens the roots and makes your lawn vulnerable.

Watering Strategy:

  • Frequency: Every 3–4 days
  • Amount: About 1 to 1.5 inches per week
  • Time: Water between 5 AM and 9 AM
  • Tools: Use rotating sprinklers or an irrigation system for full coverage

DIY Hack: Use tuna cans across your lawn — when they’re full, your lawn’s had about 1″ of water.

3. Fertilization: Feed It Like an Athlete

Bermuda grass is a heavy feeder. If you want a thick, green lawn, you’ve got to give it the right fuel.

Summer Fertilizer Plan:

  • Frequency: Every 4–6 weeks
  • Type: High-nitrogen, like 29-0-5 or 16-4-8
  • Slow vs Fast Release: Use slow-release to avoid burn and provide steady feeding

Recommended Products:

  • Milorganite (organic, safe, and slow-release)
  • Scotts Turf Builder Southern Lawn Food
  • Lesco 24-2-11 for professionals

Sample Schedule:

Month Fertilizer Purpose
May 16-4-8 Kickstart growth
June 29-0-5 Push color and density
July Milorganite Slow release, steady green
August 29-0-5 Maintain deep color

4. Weed Control: Pre-Emergent and Spot Spray

Weeds steal water, nutrients, and pride. Stop them before they start.

Weed Control Plan:

  • Pre-Emergent: Apply Feb–April (Prodiamine works great)
  • Post-Emergent: Spot spray with Spectracide or Tenacity during summer
  • Time: Spray early morning or evening, never during mid-day heat

5. Pest & Disease Prevention

Watch for brown patches, sudden bird activity, or fungus growth. These signs could mean armyworms, grubs, or chinch bugs.

DIY Pest Tips:

  • Apply Bifen L/P granules in early summer
  • Water deeply but don’t overwater
  • Keep thatch under control (see below)

6. Dethatching & Aeration: Let It Breathe

Too much thatch = unhealthy grass. Aerate and dethatch once per year to allow nutrients, water, and air to penetrate.

Steps:

  • Dethatch: Late spring or early summer with rake or power tool
  • Aerate: Use a core aerator in May or June
  • Bag debris: Don’t leave heavy thatch on the lawn

7. Soil Testing: Know What’s Under Your Lawn

Testing your soil gives you data to fix hidden problems like pH or nutrient deficiencies.

  • Use a DIY kit or send to your local extension office
  • Ideal pH for Bermuda: 5.8–7.0
  • Adjust with lime or sulfur depending on test results

8. Edging, Striping, and Grooming

This is the DIY Dad difference: crisp edges, sharp lines, and clean borders.

Must-Have Tools:

  • Gas or manual edger
  • Striping kit or roller bar
  • Leaf blower to clean off sidewalks and driveways

Pro Look: Alternate mowing directions weekly — try diagonals or checkerboard patterns for visual impact.

9. Summer Stress Solutions

Drought Stress:

  • Mow higher (1.5” range)
  • Use wetting agents to help water penetrate

Heat Stress:

Lawn Burn:

  • Water right after fertilizer application
  • Spot water during extreme sun exposure

10. DIY Dad’s Weekly Bermuda Lawn Routine

Day Task
Monday Mow lightly + water early
Tuesday Inspect for weeds/pests + spot treat
Wednesday Rest day / observe lawn
Thursday Edge & stripe for clean borders
Friday Mow + blower finish
Saturday Deep watering day
Sunday Cold drink + admire the masterpiece

Final Thoughts

Bermuda grass is the ultimate DIY dad turf. It rewards effort with stunning looks and thick green beauty. It just needs consistent care, smart timing, and the right tools. Take pride in the process and enjoy the results — a lush, golf-course yard that turns heads and feels great underfoot.

What does a lawn biostimulant do?

A lawn biostimulant improves a plant’s ability to absorb nutrients, develop deep root systems, and withstand environmental stress like heat or drought. Unlike traditional fertilizers that simply feed the grass, biostimulants use natural ingredients like humic acid, fulvic acid, and sea kelp to enhance soil biology and microbial activity. This creates a healthier foundational growing environment so your turf can perform at its full potential.

Does a biostimulant replace lawn fertilizer?

No, a lawn biostimulant does not replace traditional fertilizer. Instead, it works alongside your regular lawn care program to make your soil more efficient. By improving soil structure and root health, a biostimulant ensures your grass can fully absorb and utilize the nutrients provided by your standard granular or liquid fertilizers.

When should I apply a biostimulant to Bermuda grass?

You should apply a biostimulant to Bermuda grass during its active growing season, typically from late spring through early fall. For the best results, apply the liquid concentrate evenly over the lawn before periods of peak summer heat to maximize root support and stress resilience, pairing it with a deep, infrequent watering schedule.

How long does it take for a lawn biostimulant to work?

Because biostimulants focus on long-term soil health and root development rather than forcing immediate top growth, visible results typically appear within two to four weeks. Over this period, the enhanced chlorophyll production from ingredients like amino acids and chelated iron will produce a richer, deeper green color and a thicker turf canopy.

📣 Share Your Lawn!

Love your lawn? Drop a comment, post your progress, or tag us on social — we’d love to feature your turf. Want more tips? Subscribe for weekly lawn care updates!