Posted on Leave a comment

Emerald Boost™ Lawn Biostimulant: What It Does, How to Apply It & What to Expect

🌿 Emerald Boost™ Lawn Biostimulant

Deep Green. Naturally.

Emerald Boost™ is a concentrated lawn biostimulant designed to support the foundation of turf health: the roots and the soil. It complements your existing lawn‑care program by improving nutrient efficiency, supporting natural plant processes, and helping create deeper, richer color without forcing excessive top growth.


⭐ Why Your Lawn Needs More Than Fertilizer

Most homeowners chase green color by applying more nitrogen. But the real magic of a beautiful lawn happens below the surface. Healthy turf depends on:

  • 🌱 Strong roots
  • 🪨 Balanced soil
  • 💧 Proper moisture movement
  • ⚡ Efficient nutrient use
  • 🌤️ A stable growing environment

Emerald Boost™ supports that system — the part you don’t see but absolutely rely on.


🧪 What Is Emerald Boost™?

Emerald Boost™ is an 8 fl oz concentrated biostimulant formulated to complement fertilizer, mowing, watering, and soil management.

Mixing Ratio:
One bottle makes up to 4 gallons of spray solution. Apply evenly using a pump, backpack, or battery sprayer. Always follow the product label.


🔬 What’s Inside Emerald Boost™ (and Why It Matters)

🌿 Kelp
Supports natural plant processes and overall vigor.

🟫 Humic Acid
Improves soil structure, moisture retention, and nutrient interaction.

⚡ Fulvic Components
Enhance nutrient availability and movement within the plant.

🧬 Amino Acids
Provide building blocks for growth and stress tolerance.

🌵 Yucca
Helps water penetrate soil more effectively.

🟩 Chelated Iron
Contributes to deeper natural color without forcing excessive growth.


📊 Biostimulant vs Fertilizer

Biostimulant Fertilizer
Supports soil & root processes Provides essential nutrients
Improves long-term turf resilience Drives immediate top growth
Complements a full lawn program Essential but incomplete alone

🌱 Why Root Health Matters

Your lawn faces heat, drought, heavy rain, foot traffic, mowing stress, compaction, insects, and disease. A strong root system is what allows turf to survive and recover.

A beautiful lawn isn’t built from the top down — it’s built from the ground up.


🧰 How to Apply Emerald Boost™

  1. 🧼 Start with a clean sprayer
  2. 💧 Add water first
  3. 🧪 Add Emerald Boost™
  4. 💧 Add remaining water
  5. 🔄 Agitate gently
  6. 🚶 Apply evenly
  7. 🔁 Re‑agitate occasionally

🎯 Sprayer Calibration

Even coverage creates predictable results.

Spray a measured area using plain water, measure how much was used, and you’ll know your sprayer’s output per 1,000 sq ft.


📅 When to Apply

  • 🔥 Warm‑season grasses: late spring through summer
  • 🍂 Cool‑season grasses: spring and fall

Consistency matters more than frequency.


🌾 Grass Types That Benefit

  • 🌿 Bermuda
  • 🌱 Zoysia
  • 🌴 St. Augustine
  • 🍃 Fescue

🔍 What Results to Expect

Supports:

  • 🌱 Root development
  • 🪨 Soil condition
  • 🌿 Turf density
  • ⚡ Nutrient efficiency
  • 🔄 Recovery
  • 💪 Overall vigor

Cannot fix alone:

  • 🧱 Severe compaction
  • 🚫 Poor irrigation
  • 🌑 Lack of sunlight
  • 🐛 Insect damage
  • 🦠 Active disease
  • ✂️ Incorrect mowing
  • ⚠️ Major nutrient deficiencies

📸 Tracking Your Results

Take photos before your first application, from the same angle, at the same time of day. Pull a soil plug occasionally to inspect root development — the real story is underground.


🟩 Emerald Boost™ + Bermuda Grass

Bermuda responds extremely well to frequent mowing, proper irrigation, balanced fertility, soil management, and root‑zone support. Emerald Boost™ fits naturally into a Bermuda program focused on density, color, and recovery.


🌱 Ready to support stronger roots, healthier soil, and a more resilient lawn?

Try LandscapeMarks™ Emerald Boost™ lawn biostimulant concentrate as part of your complete lawn-care program.

Shop Emerald Boost™ →


🧪 Should You Use Emerald Boost™ With Fertilizer?

Yes. Emerald Boost™ complements fertilizer. It does not replace it.

Fertility + Mowing + Irrigation + Soil Management + Root Support = Complete Lawn Care.


🧪 Soil Testing

A soil test reveals pH, nutrient levels, and hidden limitations. This prevents wasted money and misdiagnosed problems.


💧 Watering Still Matters

No biostimulant replaces proper irrigation. Water deeply, not daily.


✂️ Mowing Still Matters

Sharp blades. Correct height. Consistent frequency. Avoid removing more than one‑third of the blade.


🧱 Emerald Boost™ Isn’t a Shortcut — It’s a System

It’s not fertilizer, herbicide, insecticide, fungicide, or a cure for poor mowing or watering. It’s a support product for homeowners who want a complete lawn‑care strategy.


🏡 Who Emerald Boost™ Is For

  • 🏠 DIY homeowners
  • 🎥 Reel‑mowing enthusiasts
  • 🔥 Bermuda fanatics
  • 📚 Lawn‑care learners
  • 🔬 Anyone wanting deeper turf understanding
  • 💡 Anyone tired of “just throw fertilizer at it”

❓ Frequently Asked Questions

Is it a fertilizer?
No — it complements fertilizer.

How much water do I mix with it?
Up to 4 gallons per bottle.

Will it make my lawn green?
It contains iron, but the goal is overall turf quality.

Can it fix a damaged lawn?
Only if the underlying issue is addressed.

Do I need professional equipment?
No — any calibrated sprayer works.


🛒 Ready to Build Your Lawn From the Ground Up?

LandscapeMarks™ Emerald Boost™ Lawn Biostimulant Concentrate
Support the roots. Support the soil. Build a better lawn.

BUY IT NOW


🌿 Final Takeaway

A truly beautiful lawn isn’t built only from the top down. It’s built from the ground up.

Emerald Boost™ helps you build the foundation.

Posted on Leave a comment

How to Maximize Your Bermuda Grass in the Summer

There’s something special about stepping onto your lawn in the summer and seeing that perfect, deep green Bermuda grass — dense, soft, and striped like a fairway at Augusta. For DIY dads who take pride in their turf, summer is game time. But thriving Bermuda grass doesn’t happen by accident. It takes smart planning, timing, the right tools, and a bit of grit.

In this guide, we’ll walk you through how to maximize your Bermuda grass lawn during the summer — from mowing strategy to fertilization, watering, weed control, and pro-level tips most homeowners overlook.


Why Summer Is Bermuda Grass Season

Bermuda grass loves heat. It thrives when the temps are between 85°F and 100°F. That’s why summer is its growing season — when it can explode with growth if you give it what it needs.

But here’s the catch: summer can also stress your turf with heat, drought, pests, and overuse. That means you need a summer lawn game plan built for performanceresilience, and looks.

Supporting strong roots and healthy soil is another important part of summer Bermuda care. LandscapeMarks™ Emerald Boost™ lawn biostimulant is designed to support root development, soil health, turf resilience, and rich green color as part of a complete Bermuda lawn-care program.

1. Mowing: The Secret to That Tight, Carpet-Like Look

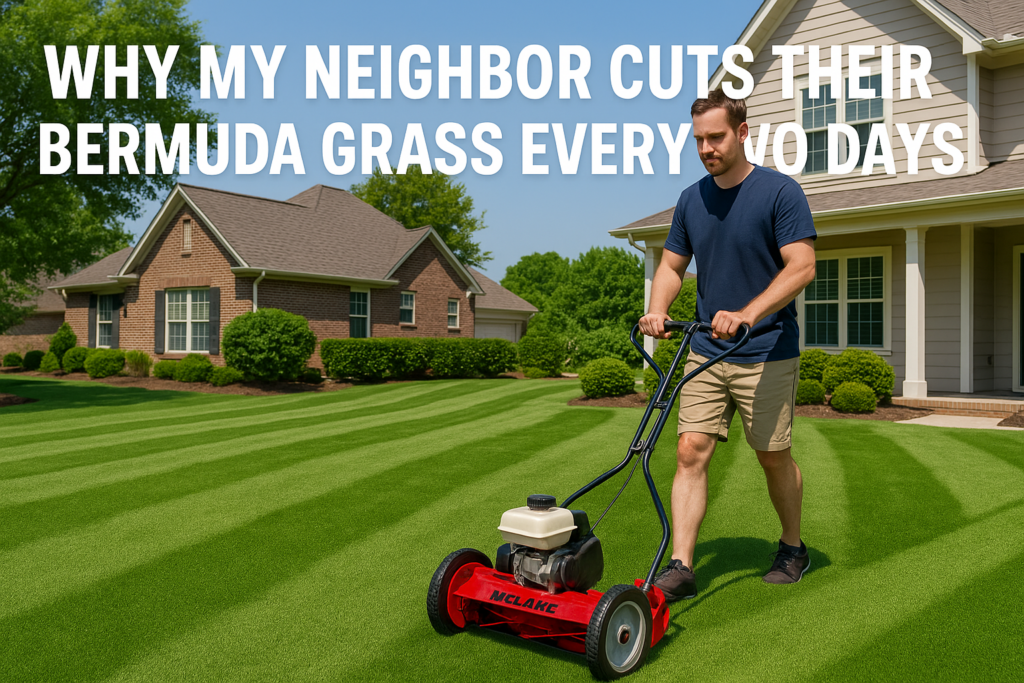
Most DIY dads mow too high. Bermuda grass is a low-mow turf — and mowing short (but often) is the key to making it look like a golf green.

Mowing Rules for Bermuda Grass in Summer:

  • Height: Mow at 0.5” to 1.5” (Reel mower preferred for <1”)
  • Frequency: Every 2–3 days
  • Rule of Thirds: Never cut more than 1/3 of the blade at once
  • Clippings: Use a mulching mower or bag thick clippings

Pro Tip: Want those beautiful lawn stripes? Invest in a reel mower like a McLane or Tru Cut — it slices instead of tears for that golf-course look.

2. Watering: Deep, Infrequent, and Early

Bermuda roots love deep watering — but only when needed. Daily watering weakens the roots and makes your lawn vulnerable.

Watering Strategy:

  • Frequency: Every 3–4 days
  • Amount: About 1 to 1.5 inches per week
  • Time: Water between 5 AM and 9 AM
  • Tools: Use rotating sprinklers or an irrigation system for full coverage

DIY Hack: Use tuna cans across your lawn — when they’re full, your lawn’s had about 1″ of water.

3. Fertilization: Feed It Like an Athlete

Bermuda grass is a heavy feeder. If you want a thick, green lawn, you’ve got to give it the right fuel.

Summer Fertilizer Plan:

  • Frequency: Every 4–6 weeks
  • Type: High-nitrogen, like 29-0-5 or 16-4-8
  • Slow vs Fast Release: Use slow-release to avoid burn and provide steady feeding

Recommended Products:

  • Milorganite (organic, safe, and slow-release)
  • Scotts Turf Builder Southern Lawn Food
  • Lesco 24-2-11 for professionals

Sample Schedule:

MonthFertilizerPurpose
May16-4-8Kickstart growth
June29-0-5Push color and density
JulyMilorganiteSlow release, steady green
August29-0-5Maintain deep color

4. Weed Control: Pre-Emergent and Spot Spray

Weeds steal water, nutrients, and pride. Stop them before they start.

Weed Control Plan:

  • Pre-Emergent: Apply Feb–April (Prodiamine works great)
  • Post-Emergent: Spot spray with Spectracide or Tenacity during summer
  • Time: Spray early morning or evening, never during mid-day heat

5. Pest & Disease Prevention

Watch for brown patches, sudden bird activity, or fungus growth. These signs could mean armyworms, grubs, or chinch bugs.

DIY Pest Tips:

  • Apply Bifen L/P granules in early summer
  • Water deeply but don’t overwater
  • Keep thatch under control (see below)

6. Dethatching & Aeration: Let It Breathe

Too much thatch = unhealthy grass. Aerate and dethatch once per year to allow nutrients, water, and air to penetrate.

Steps:

  • Dethatch: Late spring or early summer with rake or power tool
  • Aerate: Use a core aerator in May or June
  • Bag debris: Don’t leave heavy thatch on the lawn

7. Soil Testing: Know What’s Under Your Lawn

Testing your soil gives you data to fix hidden problems like pH or nutrient deficiencies.

  • Use a DIY kit or send to your local extension office
  • Ideal pH for Bermuda: 5.8–7.0
  • Adjust with lime or sulfur depending on test results

8. Edging, Striping, and Grooming

This is the DIY Dad difference: crisp edges, sharp lines, and clean borders.

Must-Have Tools:

  • Gas or manual edger
  • Striping kit or roller bar
  • Leaf blower to clean off sidewalks and driveways

Pro Look: Alternate mowing directions weekly — try diagonals or checkerboard patterns for visual impact.

9. Summer Stress Solutions

Drought Stress:

  • Mow higher (1.5” range)
  • Use wetting agents to help water penetrate

Heat Stress:

  • Don’t mow during heatwaves
  • Skip fertilizing when temps exceed 95°F

Lawn Burn:

  • Water right after fertilizer application
  • Spot water during extreme sun exposure

10. DIY Dad’s Weekly Bermuda Lawn Routine

DayTask
MondayMow lightly + water early
TuesdayInspect for weeds/pests + spot treat
WednesdayRest day / observe lawn
ThursdayEdge & stripe for clean borders
FridayMow + blower finish
SaturdayDeep watering day
SundayCold drink + admire the masterpiece

Final Thoughts

Bermuda grass is the ultimate DIY dad turf. It rewards effort with stunning looks and thick green beauty. It just needs consistent care, smart timing, and the right tools. Take pride in the process and enjoy the results — a lush, golf-course yard that turns heads and feels great underfoot.

📣 Share Your Lawn!

Love your lawn? Drop a comment, post your progress, or tag us on social — we’d love to feature your turf. Want more tips? Subscribe for weekly lawn care updates!

Posted on Leave a comment

Why the McLane Reel Mower is the Ultimate Choice for Home Lawns

If you’re serious about achieving a golf course-quality lawn at home—especially if you’re growing Bermuda grass—then it’s time to talk about reel mowers. Not all reel mowers are created equal, and among the most respected names in the industry is McLane. Known for their precision, durability, and professional-grade performance, McLane reel mowers have become the go-to choice for lawn care enthusiasts, homeowners, and turf experts alike.

In this post, we’ll break down why McLane stands out among reel mower brands, explore the difference between 10-blade and lower-blade options, and help you understand the benefits of a smooth roller versus a grooved roller. By the end, you’ll be equipped with the knowledge you need to confidently invest in the right mower for your dream lawn.


What Makes Reel Mowers Ideal for Home Lawns?

  • Cleaner Cuts: Reel mowers use a scissor-like motion to slice the grass cleanly, as opposed to rotary mowers that tear the blades.
  • Healthier Lawns: A clean cut reduces stress on the grass, minimizing disease and brown tips.
  • Stripe Capabilities: With the right roller, reel mowers can create professional-looking stripes.
  • Low Cutting Heights: Ideal for warm-season grasses like Bermuda, which thrive when cut low (often between 0.5 and 1 inch).

Why McLane Is a Standout Reel Mower Brand

McLane is a legacy American brand with over 75 years of experience in commercial and residential lawn equipment. Their reel mowers are built with high-quality materials, precision engineering, and user-focused design.

Key Benefits of McLane Reel Mowers:

  • Commercial-Grade Precision for Home Use: Delivers the same cut quality seen on golf courses.
  • Self-Propelled Power with Push Control: Offers gas-powered and push-only models for flexibility.
  • Adjustable Cutting Heights: Easily adjust for ultra-low cuts perfect for Bermuda grass.
  • Durability: Heavy-duty steel frames, high-torque engines, and precision reels built to last.
  • Made in the USA: Built with quality materials and domestic craftsmanship.

Blade Count: Why the 10-Blade McLane Mower Wins

7-Blade Reel:

  • Ideal for general-purpose mowing.
  • Works well on lawns cut between 1″–2″.
  • Less frequent sharpening required.
  • Suitable for thicker grass types.

10-Blade Reel:

  • Offers a finer, more precise cut.
  • Best for low mowing heights (under 1 inch).
  • Perfect for Bermuda, Zoysia, and hybrid grasses.
  • Reduces stress on the grass blade tips for a carpet-like lawn.

Bottom Line: If you want a lawn that turns heads, the McLane 10-blade reel mower is the best choice for accuracy, smoothness, and results.

Smooth Roller vs Grooved Roller: What’s the Difference?

Smooth Roller:

  • Best for Flat, Even Lawns
  • Provides a clean roll and is easier to maneuver.
  • Minimizes turf damage.
  • Ideal for creating striped lines.

Grooved Roller:

  • Great for Slightly Uneven Lawns
  • Provides more traction.
  • Helps channel grass into the reel more effectively.
  • Reduces risk of scalping on uneven surfaces.

Recommendation: If you want show-stopping lawn stripes, go with a smooth roller. If you’re still leveling your yard or want more grip, opt for a grooved roller.

Side-by-Side Feature Comparison: McLane vs Other Brands

FeatureMcLane Reel MowerCommon Alternatives
Blade Count Options7-blade, 10-bladeUsually 5–7 blades
Cutting Height Range0.166″ to 1.5″ (adjustable)Often starts at 1″ or higher
Build QualityCommercial-grade steelLightweight aluminum/plastic
Roller OptionsSmooth or GroovedUsually one fixed option
PropulsionPush or Self-propelled GasMostly push-only
Lawn CompatibilityIdeal for Bermuda, ZoysiaLess precision for hybrids
Price Range$$$ (premium)$$ (mid-range)

How to Maintain a McLane Reel Mower for Longevity

  • Sharpen the Blades: Every 25–30 hours of use.
  • Clean After Mowing: Use a brush to remove clippings.
  • Check Blade Contact: Use a paper strip to test reel-to-bedknife alignment.
  • Grease Bearings: Lubricate reel and roller axles regularly.
  • Level Your Lawn: Use topdressing to prevent scalping.

Tips for Getting the Most from Your McLane Mower

  • Mow 2–3 Times Weekly during the growing season.
  • Overlap Slightly to prevent missed strips.
  • Use a Roller for professional-looking stripes.
  • Never Mow Wet Grass to prevent damage and clumping.

Want to Buy a McLane Mower? Here’s My Insider Tip

If you’re ready to invest in a McLane reel mower and want to speak directly with someone who knows these machines inside and out, I highly recommend contacting Eduardo Garcia, the Sales Manager at McLane Manufacturing.

📞 Call Eduardo at: (562) 633-8158

🗣️ Tell him that Yard Guy, Ryan Marks, sent you! Eduardo is a true professional who can walk you through the best McLane model for your yard and help with purchasing, shipping, and setup questions.

Personal Note: I personally own the 25-inch McLane Greenskeeper model, and let me tell you—it has made my mowing experience absolutely amazing. The precision, the clean cut, the power… there’s no comparison. If you’re serious about your lawn, this is the mower to get.


🎥 See My McLane Mower in Action

Check out this quick video of my personal unboxing and setup of the McLane 25” Greenskeeper.

▶️ Watch the video on Facebook

This video was my Christmas in July from McLane!

🎬 The Beautiful Cut from My McLane 25-Inch Greenskeeper

Want to see the results for yourself? Here’s a quick TikTok I posted showing the amazing cut my McLane 25-inch Greenskeeper delivers. It’s smooth, sharp, and absolutely stunning on Bermuda grass.

📲 Watch on TikTok

You’ll see why I never mow with anything else.


Final Thoughts: Invest in Precision Lawn Care

The McLane reel mower is more than just a tool—it’s a gateway to lawn excellence. Whether you’re a beginner learning to care for Bermuda or a seasoned turf pro, choosing the right mower can dramatically change your results.

From the 10-blade reel that delivers clean, consistent cuts, to the roller options that shape your lawn’s appearance, McLane offers unmatched control and performance. It’s a premium investment—but one that pays for itself in curb appeal and satisfaction.

Upgrade Your Lawn Game Today

Posted on Leave a comment

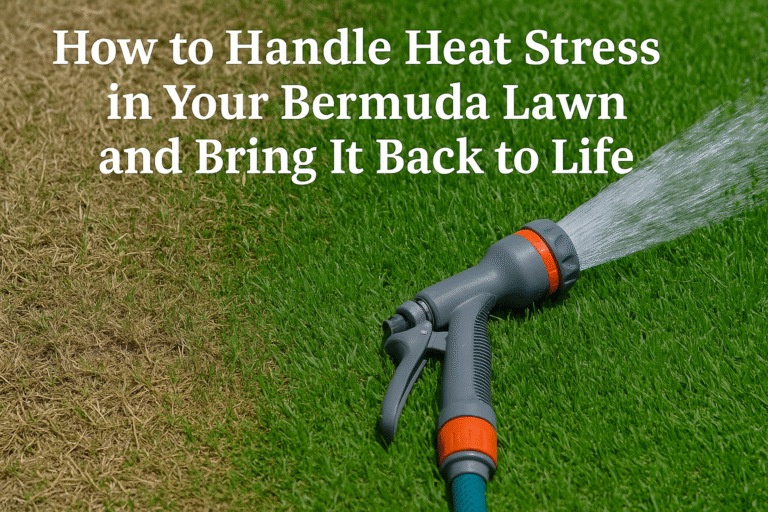
How to Handle Heat Stress in Your Bermuda Lawn and Bring It Back to Life

Introduction: The Scorched Summer Challenge

The sizzling heat of summer can take a toll on more than just your air conditioning bill—it can also wreak havoc on your once-vibrant Bermuda lawn. When temperatures rise into the 90s and beyond, and rainfall becomes scarce, even the toughest turfgrass like Bermuda can begin to show signs of stress. If you’ve noticed brown patches, thinning turf, or a dry, crunchy feel underfoot, you’re not alone.

In this post, we’ll walk through:

  • What heat stress looks like in Bermuda grass
  • How to recover your lawn effectively
  • The best tools and products to aid the healing process
  • Preventative steps to keep your turf strong during future heat waves

Let’s bring your lawn back to life—one blade at a time.

Supporting root and soil health can also be an important part of helping Bermuda grass handle periods of environmental stress. LandscapeMarks™ Emerald Boost™ lawn biostimulant is designed to support stronger roots, healthier soil, and improved turf resilience as part of a complete lawn-care program.

1. Spotting Heat Stress in Bermuda Grass

Bermuda grass is known for its resilience, but even this drought-tolerant species has its limits. Signs of heat stress typically appear after prolonged exposure to high temperatures (above 90°F) combined with insufficient irrigation.

Symptoms to Watch For:

  • Brown or yellow patches: Often starting in high-sun areas
  • Thin turf: Especially where mowing or foot traffic is frequent
  • Wilted, curled blades: The leaf blades curl to conserve moisture
  • Crunchy feel underfoot: Lack of turgor pressure in the plant cells
  • Delayed spring green-up: If damage carries into next season

Important Note: Don’t confuse heat stress with fungus or pests. Always inspect the roots and soil moisture levels before making assumptions.

2. Step-by-Step Recovery Plan for Heat-Stressed Bermuda Grass

Step 1: Deep Watering (Correctly!)

Shallow watering only worsens the problem. You want deep, infrequent watering to push roots down.

Watering Tips:

  • Water early in the morning (4 AM – 9 AM) to reduce evaporation.
  • Apply 1 to 1.5 inches of water per week, ideally in two sessions.
  • Use a rain gauge or tuna can to measure water output.

Recommended Product:

👉 Rain Bird 32ETI Easy to Install In-Ground Automatic Sprinkler System Kit

A DIY-friendly way to ensure consistent deep watering. Perfect for medium to large yards.

Step 2: Aerate the Lawn

Compacted soil prevents water and nutrients from reaching the roots. Aeration opens the way for recovery.

Types of Aeration:

  • Manual core aerators for small areas
  • Spike shoes for occasional touch-ups
  • Tow-behind plug aerators for large lawns

Recommended Product:

👉 Agri-Fab 45-0299 48-Inch Tow Plug Aerator

Great for large Bermuda lawns. Pulls 3” plugs to improve airflow and drainage.

Step 3: Apply Soil Amendments

Your soil may be lacking key nutrients after a heatwave. Organic matter can help retain moisture and restore microbial life.

Top Products:

  • Compost or peat moss
  • Humic acid and sea kelp blends
  • Micronutrient-rich fertilizers

Recommended Product:

👉 Simple Lawn Solutions Soil Hume: Liquid Humic Acid Concentrate

Improves soil structure, nutrient uptake, and drought resilience.

Step 4: Feed It—Gently

Avoid heavy nitrogen fertilizers during a heatwave—they can burn your lawn. Instead, go for slow-release or organic blends.

Recommended Product:

👉 Milorganite All-Purpose Eco-Friendly Slow-Release Nitrogen 6-4-0 Fertilizer, 5 Pound Bag – for Lawns, Flowers and Gardens

Low nitrogen, iron-rich formula safe for stressed Bermuda.

Step 5: Raise Your Mowing Height

Short cuts in hot weather stress the crown of the grass. Raise your reel mower or rotary blade to 2.5–3 inches during heat recovery.

Recommended Reel Mower:

👉 McLane 25-Inch Reel Mower

Precise and professional-quality cut. Raise the height to protect the crown.

Step 6: Spot-Seed or Plug Bare Areas

Once the temperatures start to drop, you can repair severely damaged areas with Bermuda grass seed or sod plugs.

Best Time to Reseed: Late summer to early fall, when soil temps are still warm but heat is easing.

Recommended Product:

👉 Scotts Turf Builder Grass Seed Bermudagrass with Fertilizer and Soil Improver, Drought-Tolerant, 8 lbs

Great for patching heat-damaged areas. Coated for better drought performance.

Step 7: Add Mulch to Bare Soil

If there are bald patches, use mulch or straw to keep soil moist and reduce evaporation.

Recommended Product:

👉 EZ-Straw Seeding Mulch with Tackifier

Perfect for protecting new seed or plugs from heat and birds.

3. Smart Prevention: Beat the Heat Next Time

A. Install a Smart Sprinkler Controller

Automated systems save water and protect your lawn by adapting to weather.

👉 Rachio WiFi Smart Sprinkler Controller (8-Zone Irrigation Remote Control) – App-Based Scheduling, Local Weather Intelligence, Rain Skips, Easy DIY Install

Uses real-time weather data to schedule watering. Alexa compatible.

B. Use a Moisture-Retaining Soil Conditioner

Products like hydrogels or wetting agents help retain moisture around the root zone.

👉 Hydretain Root Zone Moisture Manager

Proven to reduce watering needs by 50%. Works especially well on sandy soils.

C. Mow with Sharp Blades Only

A dull blade tears grass, which stresses it even more in heat.

👉 American Lawn Mower Co. SK-2 Reel Lawn Mower Hand Sharpener

Easy DIY sharpening kit for rotary or reel mower blades.

D. Create Shade in Extreme Zones

Strategically plant small trees or install sail shades in areas of your yard that get intense afternoon sun.

👉 Shade Sail Canopy Kit (UV Resistant)

Simple and stylish way to give parts of your lawn a break.

4. Frequently Asked Questions

Q: Can Bermuda grass survive extreme heat without watering?

Only for a short period. It will go dormant but can die if dry conditions persist. Consistent watering is essential.

Q: Should I fertilize my heat-stressed lawn?

Yes, but only with gentle fertilizers like Milorganite or compost teas. Avoid high-nitrogen synthetic products during peak heat.

Q: How long does recovery take?

You’ll start seeing improvement in 2–3 weeks if conditions are right. Full recovery might take a full season depending on damage.

Conclusion: Your Comeback Game Plan

Heat stress might seem like a death sentence for your lawn, but Bermuda grass is surprisingly forgiving—if you act wisely and quickly. By adjusting your mowing height, watering schedule, and feeding strategy, you can restore a stressed-out lawn and even make it stronger for future summers.

Remember: It’s not just about recovery—it’s about setting up your turf to thrive long-term.

Your Bermuda Grass Comeback Kit – Quick Links Recap

If you found this guide helpful, be sure to check out our TikTok channel for more tips, tutorials, and lawn inspiration!

Posted on Leave a comment

Root Rot in Evergreens and Other Plants: How to Identify, Prevent, and Recover

Root rot is one of the most common — and deadly — problems for evergreens, shrubs, and other landscape plants. It often goes unnoticed until it’s too late. By the time your plants start showing visible symptoms like yellowing leaves or wilting, the damage beneath the surface is already well underway.

In this comprehensive guide, we’ll cover:

  • What causes root rot and how it spreads
  • Common signs and symptoms in evergreens and other plants
  • Best practices for prevention and soil management
  • Treatment and recovery options for infected plants
  • Recommended products to help manage or prevent root rot

Whether you’re a backyard gardener or a landscape enthusiast, understanding root rot is crucial for protecting your plants and maximizing the health of your garden.


What is Root Rot?

Root rot is a fungal or water-related disease that affects the root systems of plants. It can be caused by several types of fungi, including PhytophthoraPythium, and Rhizoctonia. These pathogens thrive in overly wet, compacted, or poorly drained soil conditions.

Once present, the fungi attack the roots, breaking down the cell walls and making it impossible for the plant to absorb water and nutrients. The result: a slow, devastating decline that eventually kills the plant if not treated.

Primary Causes of Root Rot

  • Overwatering: One of the most common triggers.
  • Poor drainage: Clay soils or compacted soils retain too much water.
  • Contaminated soil or equipment: Fungal spores can spread from one plant to another.
  • Inappropriate planting depth: Planting trees and shrubs too deep can promote moisture retention at the base.

How Root Rot Affects Evergreens and Other Plants

Unlike annual flowers that may show rapid decline, evergreens often mask root rot until the infection has progressed significantly. Here’s how root rot uniquely affects different plant types:

Impact on Evergreens

Evergreens like pines, cypress, and junipers are particularly vulnerable because they rely on deep, fibrous root systems. When root rot takes hold:

  • Needles may begin to yellow or turn brown, starting at the base.
  • Tree growth slows significantly or halts altogether.
  • The tree may appear drought-stressed, even when the soil is wet.

Impact on Shrubs and Perennials

For deciduous shrubs and perennials, symptoms include:

  • Wilting, even after watering
  • Stunted growth
  • Root sections turning black or mushy upon inspection

Impact on Lawns and Groundcovers

Root rot in turfgrass or groundcovers often goes unnoticed until large patches turn brown and die. If the soil stays soggy, fungal infections can quickly spread across lawn sections.


How to Identify Root Rot in Your Garden

Above-Ground Symptoms

The challenge with root rot is that the damage is underground. However, the following above-ground symptoms should raise red flags:

  • Leaves yellowing or browning
  • Stunted or weak new growth
  • Branches that snap off easily
  • Wilting even when soil seems moist
  • Poor flower or fruit production

Below-Ground Signs

If you suspect root rot, gently dig around the base of your plant and inspect the roots:

  • Healthy roots: Firm, white, and fibrous
  • Rotting roots: Black, slimy, mushy, and foul-smelling

Tip: If your plant pulls easily from the ground with little resistance, it’s likely the roots are too damaged to anchor the plant.


How to Prevent Root Rot

Prevention is far easier — and more successful — than treating root rot after it begins. Here’s how to make your landscape more resilient:

1. Improve Drainage

  • Amend clay or compacted soils with compost or sand to increase aeration.
  • Install French drains or dry wells in low-lying areas.
  • Use raised beds for highly susceptible plants.

2. Water Wisely

  • Water deeply but infrequently, allowing soil to dry between sessions.
  • Use soaker hoses or drip irrigation to prevent surface saturation.

3. Choose the Right Plants

Select native or well-adapted plants for your soil type. Avoid moisture-loving plants if your yard has drainage issues.

4. Mulch Correctly

Apply mulch 2–3 inches deep, but avoid piling it up around the trunk or stem, which traps moisture and encourages fungal growth.

5. Inspect New Plants

Always inspect the root ball before planting. Don’t plant anything with blackened or mushy roots.

6. Sterilize Tools

Fungal spores can survive on pruning shears and garden trowels. Use a bleach solution (1:10 bleach-to-water ratio) to disinfect tools between uses.


Can You Save a Plant With Root Rot?

Recovery depends on how early the infection is caught. Mild root rot in perennials and shrubs can sometimes be reversed by acting quickly. Follow these steps:

Step-by-Step Treatment

  1. Remove the plant: Dig up the affected plant and gently wash soil from the roots.
  2. Trim damaged roots: Use sterilized scissors to snip off mushy or blackened sections.
  3. Replant in dry soil: Use fresh, well-draining soil in a new location or container.
  4. Apply a fungicide: Use a root rot treatment to help protect remaining roots (see product recommendation below).

When to Give Up

If more than 50% of the root system is compromised, it’s often better to remove the plant and dispose of it — not compost it — to prevent the spread of fungi.


Recommended Products to Prevent and Treat Root Rot

Here are three highly effective products you can use to reduce the risk of root rot and support plant recovery:

1. Bonide Revitalize Biofungicide

This biofungicide contains a beneficial microbe (Bacillus amyloliquefaciens) that combats fungal diseases and protects plant roots. It’s OMRI-listed for organic gardening and works systemically to prevent recurrence.

2. Liquid Soil Loosener

Concentrated Soil Conditioner: Soften Your Soil with this Advanced Lawn Solution, Easy To Use Treatment. Liquid Soil Loosener is Concentrated Liquid Solution. 32 ounce Bottle Covers up to 32,000 square feet.

3. Earth Science Fast Acting Gypsum – Soil Conditioner

Loosening soil allows for better water retention and airflow which helps the soil to support healthy plants. Gypsum can also help repair salt-damaged soil. Gypsum adds calcium to soil, which helps plants suffering from blossom-end rot.


Final Tips and Key Takeaways

  • Root rot often begins where you can’t see it — below ground. Prevention is your best defense.
  • Act quickly when symptoms appear. Inspect the roots to confirm diagnosis.
  • Amend soil, avoid overwatering, and use biological fungicides for long-term protection.
  • Some plants can recover, but badly infected ones may need to be replaced.

With proper awareness and garden hygiene, you can stop root rot before it ever starts — and keep your evergreens and ornamentals healthy year-round.


Have You Dealt With Root Rot in Your Garden?

Share your story or ask questions in the comments below. And don’t forget to check out this short clip and others by following us on TikTok.

🎥 Root Rot: Vanderwolf PineNeed tools or treatments? Click any of the product links above to grab trusted tools and root rot solutions from Amazon. Every purchase supports this blog through the Amazon Associates Program.