Category: Reel Mowing

Brands, Cut Quality, Striping, Height of Cut, Reel Maintenance

  • How to Maximize Your Bermuda Grass in the Summer

    There’s something special about stepping onto your lawn in the summer and seeing that perfect, deep green Bermuda grass — dense, soft, and striped like a fairway at Augusta. For DIY dads who take pride in their turf, summer is game time. But thriving Bermuda grass doesn’t happen by accident. It takes smart planning, timing, the right tools, and a bit of grit.

    In this guide, we’ll walk you through how to maximize your Bermuda grass lawn during the summer — from mowing strategy to fertilization, watering, weed control, and pro-level tips most homeowners overlook.


      Why Summer Is Bermuda Grass Season

      Bermuda grass loves heat. It thrives when the temps are between 85°F and 100°F. That’s why summer is its growing season — when it can explode with growth if you give it what it needs.

      But here’s the catch: summer can also stress your turf with heat, drought, pests, and overuse. That means you need a summer lawn game plan built for performanceresilience, and looks.

      1. Mowing: The Secret to That Tight, Carpet-Like Look

      Most DIY dads mow too high. Bermuda grass is a low-mow turf — and mowing short (but often) is the key to making it look like a golf green.

      Mowing Rules for Bermuda Grass in Summer:

      • Height: Mow at 0.5” to 1.5” (Reel mower preferred for <1”)
      • Frequency: Every 2–3 days
      • Rule of Thirds: Never cut more than 1/3 of the blade at once
      • Clippings: Use a mulching mower or bag thick clippings

      Pro Tip: Want those beautiful lawn stripes? Invest in a reel mower like a McLane or Tru Cut — it slices instead of tears for that golf-course look.

      2. Watering: Deep, Infrequent, and Early

      Bermuda roots love deep watering — but only when needed. Daily watering weakens the roots and makes your lawn vulnerable.

      Watering Strategy:

      • Frequency: Every 3–4 days
      • Amount: About 1 to 1.5 inches per week
      • Time: Water between 5 AM and 9 AM
      • Tools: Use rotating sprinklers or an irrigation system for full coverage

      DIY Hack: Use tuna cans across your lawn — when they’re full, your lawn’s had about 1″ of water.

      3. Fertilization: Feed It Like an Athlete

      Bermuda grass is a heavy feeder. If you want a thick, green lawn, you’ve got to give it the right fuel.

      Summer Fertilizer Plan:

      • Frequency: Every 4–6 weeks
      • Type: High-nitrogen, like 29-0-5 or 16-4-8
      • Slow vs Fast Release: Use slow-release to avoid burn and provide steady feeding

      Recommended Products:

      • Milorganite (organic, safe, and slow-release)
      • Scotts Turf Builder Southern Lawn Food
      • Lesco 24-2-11 for professionals

      Sample Schedule:

      MonthFertilizerPurpose
      May16-4-8Kickstart growth
      June29-0-5Push color and density
      JulyMilorganiteSlow release, steady green
      August29-0-5Maintain deep color

      4. Weed Control: Pre-Emergent and Spot Spray

      Weeds steal water, nutrients, and pride. Stop them before they start.

      Weed Control Plan:

      • Pre-Emergent: Apply Feb–April (Prodiamine works great)
      • Post-Emergent: Spot spray with Spectracide or Tenacity during summer
      • Time: Spray early morning or evening, never during mid-day heat

      5. Pest & Disease Prevention

      Watch for brown patches, sudden bird activity, or fungus growth. These signs could mean armyworms, grubs, or chinch bugs.

      DIY Pest Tips:

      • Apply Bifen L/P granules in early summer
      • Water deeply but don’t overwater
      • Keep thatch under control (see below)

      6. Dethatching & Aeration: Let It Breathe

      Too much thatch = unhealthy grass. Aerate and dethatch once per year to allow nutrients, water, and air to penetrate.

      Steps:

      • Dethatch: Late spring or early summer with rake or power tool
      • Aerate: Use a core aerator in May or June
      • Bag debris: Don’t leave heavy thatch on the lawn

      7. Soil Testing: Know What’s Under Your Lawn

      Testing your soil gives you data to fix hidden problems like pH or nutrient deficiencies.

      • Use a DIY kit or send to your local extension office
      • Ideal pH for Bermuda: 5.8–7.0
      • Adjust with lime or sulfur depending on test results

      8. Edging, Striping, and Grooming

      This is the DIY Dad difference: crisp edges, sharp lines, and clean borders.

      Must-Have Tools:

      • Gas or manual edger
      • Striping kit or roller bar
      • Leaf blower to clean off sidewalks and driveways

      Pro Look: Alternate mowing directions weekly — try diagonals or checkerboard patterns for visual impact.

      9. Summer Stress Solutions

      Drought Stress:

      • Mow higher (1.5” range)
      • Use wetting agents to help water penetrate

      Heat Stress:

      • Don’t mow during heatwaves
      • Skip fertilizing when temps exceed 95°F

      Lawn Burn:

      • Water right after fertilizer application
      • Spot water during extreme sun exposure

      10. DIY Dad’s Weekly Bermuda Lawn Routine

      DayTask
      MondayMow lightly + water early
      TuesdayInspect for weeds/pests + spot treat
      WednesdayRest day / observe lawn
      ThursdayEdge & stripe for clean borders
      FridayMow + blower finish
      SaturdayDeep watering day
      SundayCold drink + admire the masterpiece

      Final Thoughts

      Bermuda grass is the ultimate DIY dad turf. It rewards effort with stunning looks and thick green beauty. It just needs consistent care, smart timing, and the right tools. Take pride in the process and enjoy the results — a lush, golf-course yard that turns heads and feels great underfoot.

      📣 Share Your Lawn!

      Love your lawn? Drop a comment, post your progress, or tag us on social — we’d love to feature your turf. Want more tips? Subscribe for weekly lawn care updates!


    • Why the McLane Reel Mower is the Ultimate Choice for Home Lawns

      If you’re serious about achieving a golf course-quality lawn at home—especially if you’re growing Bermuda grass—then it’s time to talk about reel mowers. Not all reel mowers are created equal, and among the most respected names in the industry is McLane. Known for their precision, durability, and professional-grade performance, McLane reel mowers have become the go-to choice for lawn care enthusiasts, homeowners, and turf experts alike.

      In this post, we’ll break down why McLane stands out among reel mower brands, explore the difference between 10-blade and lower-blade options, and help you understand the benefits of a smooth roller versus a grooved roller. By the end, you’ll be equipped with the knowledge you need to confidently invest in the right mower for your dream lawn.


      What Makes Reel Mowers Ideal for Home Lawns?

      • Cleaner Cuts: Reel mowers use a scissor-like motion to slice the grass cleanly, as opposed to rotary mowers that tear the blades.
      • Healthier Lawns: A clean cut reduces stress on the grass, minimizing disease and brown tips.
      • Stripe Capabilities: With the right roller, reel mowers can create professional-looking stripes.
      • Low Cutting Heights: Ideal for warm-season grasses like Bermuda, which thrive when cut low (often between 0.5 and 1 inch).

      Why McLane Is a Standout Reel Mower Brand

      McLane is a legacy American brand with over 75 years of experience in commercial and residential lawn equipment. Their reel mowers are built with high-quality materials, precision engineering, and user-focused design.

      Key Benefits of McLane Reel Mowers:

      • Commercial-Grade Precision for Home Use: Delivers the same cut quality seen on golf courses.
      • Self-Propelled Power with Push Control: Offers gas-powered and push-only models for flexibility.
      • Adjustable Cutting Heights: Easily adjust for ultra-low cuts perfect for Bermuda grass.
      • Durability: Heavy-duty steel frames, high-torque engines, and precision reels built to last.
      • Made in the USA: Built with quality materials and domestic craftsmanship.

      Blade Count: Why the 10-Blade McLane Mower Wins

      7-Blade Reel:

      • Ideal for general-purpose mowing.
      • Works well on lawns cut between 1″–2″.
      • Less frequent sharpening required.
      • Suitable for thicker grass types.

      10-Blade Reel:

      • Offers a finer, more precise cut.
      • Best for low mowing heights (under 1 inch).
      • Perfect for Bermuda, Zoysia, and hybrid grasses.
      • Reduces stress on the grass blade tips for a carpet-like lawn.

      Bottom Line: If you want a lawn that turns heads, the McLane 10-blade reel mower is the best choice for accuracy, smoothness, and results.

      Smooth Roller vs Grooved Roller: What’s the Difference?

      Smooth Roller:

      • Best for Flat, Even Lawns
      • Provides a clean roll and is easier to maneuver.
      • Minimizes turf damage.
      • Ideal for creating striped lines.

      Grooved Roller:

      • Great for Slightly Uneven Lawns
      • Provides more traction.
      • Helps channel grass into the reel more effectively.
      • Reduces risk of scalping on uneven surfaces.

      Recommendation: If you want show-stopping lawn stripes, go with a smooth roller. If you’re still leveling your yard or want more grip, opt for a grooved roller.

      Side-by-Side Feature Comparison: McLane vs Other Brands

      FeatureMcLane Reel MowerCommon Alternatives
      Blade Count Options7-blade, 10-bladeUsually 5–7 blades
      Cutting Height Range0.166″ to 1.5″ (adjustable)Often starts at 1″ or higher
      Build QualityCommercial-grade steelLightweight aluminum/plastic
      Roller OptionsSmooth or GroovedUsually one fixed option
      PropulsionPush or Self-propelled GasMostly push-only
      Lawn CompatibilityIdeal for Bermuda, ZoysiaLess precision for hybrids
      Price Range$$$ (premium)$$ (mid-range)

      How to Maintain a McLane Reel Mower for Longevity

      • Sharpen the Blades: Every 25–30 hours of use.
      • Clean After Mowing: Use a brush to remove clippings.
      • Check Blade Contact: Use a paper strip to test reel-to-bedknife alignment.
      • Grease Bearings: Lubricate reel and roller axles regularly.
      • Level Your Lawn: Use topdressing to prevent scalping.

      Tips for Getting the Most from Your McLane Mower

      • Mow 2–3 Times Weekly during the growing season.
      • Overlap Slightly to prevent missed strips.
      • Use a Roller for professional-looking stripes.
      • Never Mow Wet Grass to prevent damage and clumping.

      Want to Buy a McLane Mower? Here’s My Insider Tip

      If you’re ready to invest in a McLane reel mower and want to speak directly with someone who knows these machines inside and out, I highly recommend contacting Eduardo Garcia, the Sales Manager at McLane Manufacturing.

      📞 Call Eduardo at: (562) 633-8158

      🗣️ Tell him that Yard Guy, Ryan Marks, sent you! Eduardo is a true professional who can walk you through the best McLane model for your yard and help with purchasing, shipping, and setup questions.

      Personal Note: I personally own the 25-inch McLane Greenskeeper model, and let me tell you—it has made my mowing experience absolutely amazing. The precision, the clean cut, the power… there’s no comparison. If you’re serious about your lawn, this is the mower to get.


      🎥 See My McLane Mower in Action

      Check out this quick video of my personal unboxing and setup of the McLane 25” Greenskeeper.

      ▶️ Watch the video on Facebook

      This video was my Christmas in July from McLane!

      🎬 The Beautiful Cut from My McLane 25-Inch Greenskeeper

      Want to see the results for yourself? Here’s a quick TikTok I posted showing the amazing cut my McLane 25-inch Greenskeeper delivers. It’s smooth, sharp, and absolutely stunning on Bermuda grass.

      📲 Watch on TikTok

      You’ll see why I never mow with anything else.


      Final Thoughts: Invest in Precision Lawn Care

      The McLane reel mower is more than just a tool—it’s a gateway to lawn excellence. Whether you’re a beginner learning to care for Bermuda or a seasoned turf pro, choosing the right mower can dramatically change your results.

      From the 10-blade reel that delivers clean, consistent cuts, to the roller options that shape your lawn’s appearance, McLane offers unmatched control and performance. It’s a premium investment—but one that pays for itself in curb appeal and satisfaction.

      Upgrade Your Lawn Game Today

    • Ditch TruGreen: A DIY Homeowner’s Guide to Year-Round Lawn Care That Saves You Thousands

      Introduction

      If you’re a proud homeowner, chances are you’ve considered hiring a lawn care company like TruGreen to manage your yard. It sounds convenient—fertilization, weed control, pest treatments, all handled by “professionals.” But convenience comes at a steep price.

      In reality, you can achieve even better results by treating your own lawn, on your own schedule, and with products tailored to your specific yard. Best of all, you’ll save hundreds—if not thousands—of dollars per year.

      • Why DIY lawn care outperforms paid services
      • What it really costs to go it alone
      • How to care for your lawn season-by-season
      • The best Amazon products to use instead of TruGreen’s generic sprays

      Why DIY Lawn Care Beats TruGreen (And Saves You Money)

      Typical TruGreen Package:

      • Annual Plan Cost: $400–$1,200+
      • Includes: Fertilization, weed control, grub prevention, and sometimes aeration
      • Visit Frequency: 6–12 visits per year

      The Catch:

      • Cookie-cutter treatments, regardless of your lawn’s condition
      • Extra charges for fungus/grub control
      • Locked-in contracts and upsells

      DIY Benefits:

      • Customized lawn care specific to your needs
      • Higher-quality products
      • Significant long-term savings
      • Hands-on satisfaction

      DIY vs. TruGreen: A Cost Comparison

      ServiceTruGreen Cost (Annual Avg)DIY Cost (Annual Avg)
      FertilizerIncluded$100–$150
      Weed ControlIncluded$50–$100
      Grub Control$75–$150 Extra$25–$40
      Aeration$125–$250$40–$75 (tool rental)
      OverseedingNot always offered$40–$60
      Total$700–$1,300+$250–$400

      Your DIY Lawn Care Game Plan (Season by Season)

      🌱 Spring (March–May): Wake Up Your Lawn

      • Aerate to relieve compacted soil
      • Apply pre-emergent herbicide
      • Fertilize with high nitrogen
      • Begin weekly mowing

      Recommended Product:
      ✅ Scotts Turf Builder Weed & Feed – Tackles dandelions and thickens turf.

      ☀️ Summer (June–August): Feed and Defend

      • Water deeply (1″ per week)
      • Spot treat weeds
      • Apply grub control
      • Raise mowing height

      Recommended Product:
      ✅ BioAdvanced Complete Brand Insect Killer for Lawns – Fast-acting and long-lasting grub control.

      🍂 Fall (September–November): Strengthen Roots

      • Apply potassium-rich fertilizer
      • Overseed thin or bare areas
      • Apply post-emergent weed killer
      • Optional: Aerate again

      Recommended Product:
      ✅ Scotts Turf Builder WinterGuard Fall Lawn Food – Strengthens roots and boosts spring green-up.

      ❄️ Winter (December–February): Prep and Plan

      • Clean mower and sharpen blades
      • Test soil and plan for spring

      Recommended Product:
      ✅ Luster Leaf Rapid Soil Test Kit – Gives accurate pH and nutrient readings for your soil.


      Essential DIY Lawn Tools (You Don’t Need Much)

      • Broadcast/Drop Spreader: Scotts EdgeGuard Spreader
      • Hose-End Sprayer for liquid applications
      • Sharp Mower Blades to prevent grass tearing
      • Rake or Dethatcher for better airflow to roots

      The Secret to a Healthy Lawn: Timing, Not Just Products

      Many people think lawn care is all about throwing down fertilizer. But it’s really about consistency and seasonal timing.

      • Apply the right product at the right time
      • Mow consistently—not too short
      • Spot treat weeds and insects as needed

      💡 Pro Tip: Use a free app like My Lawn by Scotts or keep a written journal to track treatments and results.


      What About Weeds, Fungus, and Pests?

      Instead of spraying your entire lawn like TruGreen does, treat only what you need:


      Conclusion: Own Your Lawn, Keep Your Cash

      With a bit of planning and a few affordable tools, you can:

      • Save hundreds per year
      • Enjoy a thicker, greener lawn
      • Customize treatments based on your actual lawn conditions
      • Eliminate unnecessary chemicals and upsells

      Start your DIY lawn journey today and leave TruGreen behind for good.


      📌 Seasonal Lawn Care Summary

      SeasonKey Tasks
      SpringAerate, Fertilize, Pre-emergent, Mow
      SummerWater, Grub Control, Spot-weed, Raise mowing height
      FallFertilize, Overseed, Weed Control
      WinterSoil test, Sharpen tools, Plan next season

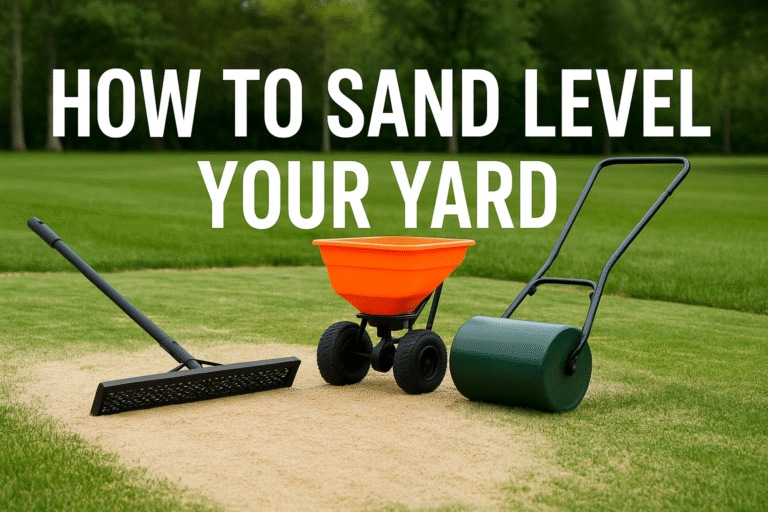
    • How to Sand Level Your Yard: Complete Guide, Costs, Benefits, and Tools

      A perfectly smooth lawn is more than just eye candy—it makes mowing easier, improves grass health, and prevents water pooling.
      If your yard is full of bumps, dips, or uneven spots, sand leveling—also known as lawn topdressing—is one of the best DIY ways to fix it.
      This guide will teach you everything you need to know about sand leveling your yard, including:

      • The step‑by‑step process to level your yard
      • When to do it and how often
      • Which type of sand to use
      • Cost and DIY vs. professional breakdowns
      • Top recommended tools, including Amazon affiliate picks

      Whether you have a bumpy Bermuda grass lawn or a cool‑season grass yard, learning to sand level can completely transform your landscape—and save you thousands compared to hiring a pro.


      What is Sand Leveling?

      Sand leveling, also called topdressing, is the process of spreading a thin, even layer of sand—or a sand‑soil mix—over your lawn to smooth out uneven surfaces. Over time, most lawns develop:

      • Low spots caused by soil settling
      • Bumps from tree roots, ant mounds, or debris
      • Water pooling areas from poor drainage
      • General unevenness caused by foot traffic, pets, or mowing

      Sand fills these low spots and helps create a smooth, uniform surface. Over a few weeks, grass grows through the sand layer and recovers with an even, professional‑looking finish.

      Golf courses, sports fields, and professional landscapes use sand leveling regularly to maintain perfect turf conditions. Homeowners can achieve the same results without heavy machinery.


      When Should You Sand Level Your Yard?

      Timing is everything in lawn care. Sand leveling works best when your grass is actively growing, so it can recover quickly and fill in the sanded areas.

      Best Timing by Grass Type

      • Warm‑season grasses (Bermuda, Zoysia, St. Augustine): Late spring to mid‑summer, once the lawn is green and growing vigorously.
      • Cool‑season grasses (Fescue, Kentucky bluegrass, Ryegrass): Early fall or late spring, avoiding summer heat stress.

      Avoid winter or dormant periods. Leveling a dormant lawn can smother grass and slow recovery.

      Signs Your Lawn is Ready for Leveling

      • Your mower frequently scalps high spots
      • Water pools after rain or irrigation
      • The lawn feels bumpy when walking barefoot
      • Grass growth looks uneven or patchy

      Benefits of Sand Leveling Your Yard

      Sand leveling offers immediate and long‑term benefits that go beyond aesthetics:

      • Smoother mowing: Prevents mower scalping and reduces wear on equipment.
      • Improved drainage: Reduces puddles and waterlogging in low spots.
      • Healthier grass: Encourages even growth and better root contact with soil.
      • Reduced trip hazards: Creates a safer yard for kids, pets, and foot traffic.
      • Better curb appeal: A flat, professional‑looking lawn adds to your property value.
      • Long‑lasting results: Sand does not decompose, so once your lawn is leveled, it stays smoother over time.

      Tools You’ll Need

      You can sand level your lawn with basic tools, but having the right equipment makes the job faster and easier.
      Here’s the essential DIY leveling toolkit:

      • Wheelbarrow or buckets – to transport sand
      • Shovel – for filling low spots
      • Leveling rake or lawn lute – for spreading and smoothing sand evenly
      • Push broom – to work sand into grass blades
      • Lawn roller (optional) – to compact sand and create a perfectly smooth finish

      Below, we’ve included three recommended Amazon tools that make leveling much easier.


      Recommended Amazon Tools for Lawn Leveling

      Using high‑quality tools saves time and produces a more professional finish. Here are three top picks with your affiliate code ready to use:

      1. Heavy‑Duty Lawn Leveling Rake

      A lawn leveling rake is a must‑have for spreading sand smoothly. Its wide, flat head helps feather out sand without gouging the grass.


      👉 Check Price on Amazon

      2. Broadcast Spreader

      A broadcast spreader helps distribute sand or sand‑soil mix more evenly across larger areas. It’s also perfect for fertilizer and seed applications year‑round.


      👉 Check Price on Amazon

      3. Lawn Roller

      A lawn roller helps compact sand and smooth your surface after spreading. It also assists in pressing grass roots back into soil contact.


      👉 Check Price on Amazon

      Tip: If your lawn is small, you can get away without the roller. For larger lawns, it makes a big difference.


      Types of Sand You Can Use

      Not all sand is created equal. The right sand improves drainage and levels the lawn without compacting your soil.
      Here are the best options:

      • Washed Masonry Sand: Fine, clean sand that blends with soil. Most recommended for homeowners.
      • USGA Golf Course Sand: Consistent particle size and great for drainage, though pricier.
      • Sand/Compost Mix: 70% sand and 30% compost adds organic matter to your lawn while leveling.

      Avoid play sand or construction sand—they’re often too fine or contain debris, which can lead to compaction and poor drainage.


      Step‑by‑Step: How to Sand Level Your Lawn

      Leveling your yard can be a satisfying weekend project. Follow these steps for the best results:

      1. Mow your lawn short. Trim grass 30–50% lower than usual to expose bumps and low spots.
      2. Dethatch or aerate. If you have a heavy thatch layer, remove it so sand can reach the soil.
      3. Identify low spots. Walk the yard or use a straight board to see dips.
      4. Apply sand or topdressing mix. Focus first on the lowest areas.
      5. Spread evenly with your leveling rake. Feather edges to blend smoothly with existing grass.
      6. Brush or drag sand into grass. A push broom or drag mat works well.
      7. Water lightly. Helps sand settle without washing it away.
      8. Repeat lightly if needed. Multiple thin layers are better than one heavy application.

      Cost of Sand Leveling

      The cost of sand leveling depends on your yard size, sand type, and whether you hire a professional.

      DIY Cost Breakdown

      • Sand: $40–$80 per cubic yard (covers ~1,000 sq. ft. at ¼” depth)
      • Tool rental: $20–$50/day for a roller or leveling rake
      • Total for small lawn (1,000–2,000 sq. ft.): $100–$300

      Professional Service Costs

      Hiring a pro can cost $1,000–$3,000+ depending on yard size. DIY is a fraction of the price.

      Cost Benefit: Doing it yourself with $200 of materials can save thousands—and the tools can be reused yearly.


      Final Tips for Success

      • Apply sand in thin layers to avoid smothering grass.
      • Level in growing season for quick recovery.
      • Use clean, washed sand to prevent weed contamination.
      • Water lightly after each application to help sand settle.

      In 2–4 weeks, your lawn will start to show results: smoother mowing, healthier grass, and a professional look right at home.

    • Why My Neighbor Cuts Their Bermuda Grass Every Two Days (And Why It Might Make Sense)

      When I first moved into my neighborhood, one thing stood out immediately: my neighbor mows his lawn every two days. Rain or shine, hot or humid, he’s out there with his mower like clockwork.

      At first, I thought he was just obsessed with his Bermuda grass. But after some digging, I realized there’s more science than madness behind his routine.

      If you’ve ever wondered why someone would mow so frequently—or whether you should adopt a similar schedule—this post explains the real reasonsbenefits, and best practices for an envy-worthy Bermuda lawn.


      Understanding Bermuda Grass

      Bermuda grass (Cynodon dactylon) is a warm-season turfgrass that thrives in hot, sunny climates. It’s common in southern states because it loves the heat and grows aggressively during summer.

      Key traits of Bermuda grass:

      • Fast-growing: Can grow up to 1 inch per week in peak season.
      • Sun-loving: Needs 6–8 hours of full sun daily.
      • Durable: Perfect for high-traffic areas like yards, parks, and golf courses.
      • Spreading nature: Expands quickly via stolons and rhizomes.

      This fast, aggressive growth is why some homeowners—like my neighbor—mow so frequently.


      Why Mow So Often?

      1. The One-Third Rule

      Lawn care experts swear by the one-third rule:

      Never cut more than one-third of the grass blade at a time.

      Bermuda grass can grow rapidly, so skipping a week often forces a large cut, which:

      • Stresses the grass
      • Leaves a scalped appearance
      • Slows growth and recovery

      By mowing every two days, my neighbor:

      • Keeps the grass consistently short and healthy
      • Avoids lawn scalping
      • Encourages dense turf growth

      2. Encourages Lateral Growth

      Frequent mowing trains Bermuda grass to spread sideways instead of growing tall.

      This results in:

      • Thicker turf
      • Fewer weeds
      • That golf-course look lawn enthusiasts love

      Benefits of Mowing Every Two Days

      1. Healthier Lawn
        • Less stress on grass blades
        • Smaller clippings that decompose into natural fertilizer
        • Easier to spot pests and diseases
      2. Weed Control
        • Dense Bermuda leaves no room for weeds
        • Frequent mowing prevents seedheads from spreading
      3. Flawless Curb Appeal
        • Consistent mowing = uniform lawn
        • No “shaggy” in-between weeks
        • Makes your yard stand out in the neighborhood

      Downsides of Frequent Mowing

      While the results are stunning, there are trade-offs:

      • Time commitment: Mowing 3–4 times a week is a big chore.
      • Equipment wear: Blades need frequent sharpening.
      • Fuel or battery costs: More mowing = higher cost.
      • Soil compaction: Walking or driving over your lawn too often can reduce root health.

      Tip: Alternate mowing directions and aerate yearly to prevent soil compaction.


      Choosing the Right Mower

      Reel Mowers (Best for Bermuda)

      • Cut grass like scissors, for a clean, precise cut
      • Allow very low cutting heights (0.5–2 inches)
      • Ideal for golf-course style Bermuda lawns

      Rotary Mowers

      If you own a rotary mower:

      • Mow often to avoid tearing tall grass
      • Keep blades sharp to prevent brown tips

      Fertilization and Watering

      Bermuda grass loves nitrogen. When properly fed, it:

      • Grows faster
      • Recovers quickly from mowing
      • Shows that deep, rich green color

      Pro Tip: Apply slow-release nitrogen fertilizer every 4–6 weeks during the growing season.

      Amazon Recommendation:
      Scotts Turf Builder Lawn Food

      Watering also affects mowing frequency. Bermuda thrives on:

      • 1–1.5 inches of water per week
      • Deep, infrequent watering rather than daily light sprays

      well-watered, well-fertilized Bermuda lawn can grow so fast that every-other-day mowing is necessary.


      Should You Mow Every Two Days?

      Before adopting your neighbor’s habit, ask yourself:

      • Do you want a golf-course look or just a tidy yard?
      • Do you have time and equipment for frequent mowing?
      • Are you prepared to fertilize and water consistently?

      If not, a compromise works well:

      • Mow every 3–4 days in peak summer
      • Mow weekly in spring and fall
      • Maintain fertilization and watering for dense, healthy turf

      Key Takeaways

      1. Bermuda grass grows quickly, so frequent mowing keeps it healthy.
      2. Every-two-day mowing encourages dense, lateral growth.
      3. Commitment and the right equipment are key to that perfect lawn.

      So the next time you see a neighbor mowing every two days, remember—it’s not obsession; it’s smart lawn strategy.

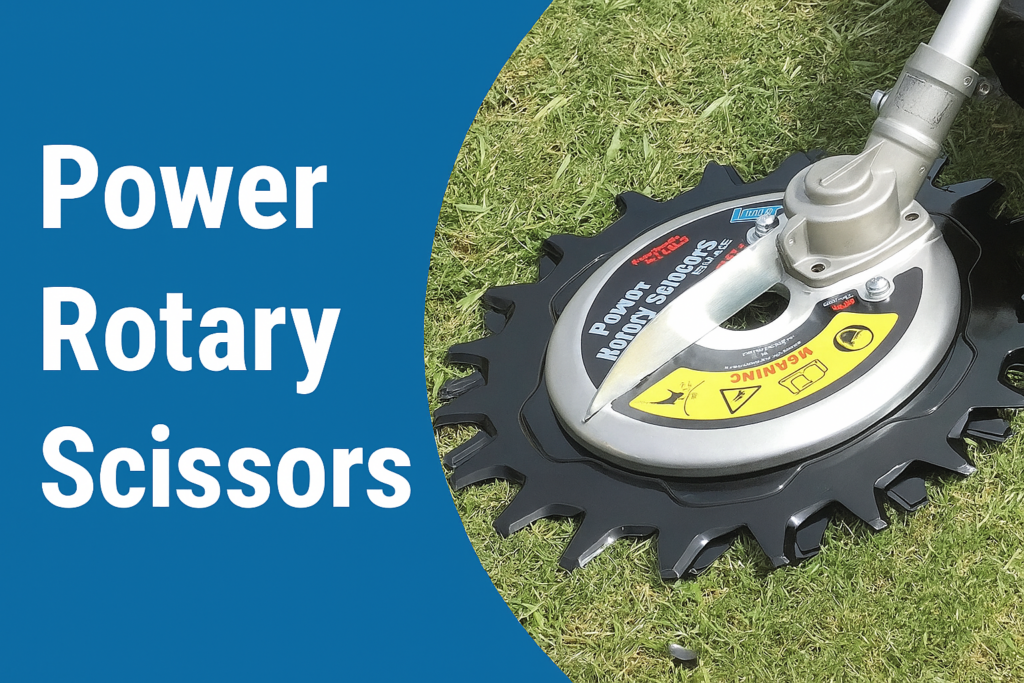
    • Unlock Precision Landscaping with Power Rotary Scissors: A Game-Changer Beyond Traditional Weedeaters

      Are you tired of uneven edging, shredded grass near curbs, and endless trimmer line replacements? Meet the Power Rotary Scissors, a powerful attachment designed to supercharge your straight‑shaft trimmer or brush cutter. Unlike regular string‑based weedeaters, this ingenious tool delivers scissor‑style precision cuts, making your lawn trimming faster, safer, and far more refined. In this post, we’ll explore its benefits, how it differs from standard trimmers, installation tips, pricing, and even provide an Amazon link for purchase.


      🏆 What Are Power Rotary Scissors?

      The Power Rotary Scissors is a solid‑steel cutting head that replaces the usual nylon line on a straight‑shaft trimmer or brush cutter. Rather than spinning filament at high speed, it uses counter‑rotating metal blades to slice through grass, weeds, vines, and even thin brush. The blades rest on a bottom steel disk, which prevents turf scalping and protects surfaces. Once you release the throttle, the blades stop almost instantly—boosting safety for both you and your landscape.

      Most kits come with adapter sleeves to fit common shaft sizes (24‑28 mm), making them compatible with many popular brands like Stihl, Echo, EGO, and Husqvarna.


      The Key Benefits of Power Rotary Scissors

      1. Precision Like You’ve Never Seen

      Unlike string trimmers that shred grass unevenly, rotary scissors cut cleanly and evenly along edges, sidewalks, and beds. They make it easy to blend mower lines for a professional finish.

      2. No More Flying Debris

      Because the blades rotate against each other with a bottom guard, there’s minimal risk of throwing rocks, mulch, or sticks. This is a huge safety win for windows, cars, and bystanders.

      3. Safe Around Pets, Plants, and Water

      These scissors can even work in shallow water or around delicate flower beds without snagging or scalping.

      4. Handles Tough Vegetation Easily

      The geared blades produce high torque that slices through thick grass, ground cover, and vines with less effort than nylon string trimmers.

      5. Durable and Sharpenable

      Unlike string that constantly breaks, the metal blades are resharpenable and designed to last for many hours of use.


      Rotary Scissors vs. Regular Weedeater

      FeaturePower Rotary ScissorsTraditional String Trimmer
      Cutting MethodScissor action (dual blades)High‑speed nylon line
      PrecisionClean, sharp edgingJagged cuts, takes practice
      DebrisMinimal flying objectsRocks and grass can fly
      SafetyMuch safer near windows & peopleHigher risk of property damage
      ReplacementSharpenable bladesFrequent line replacement
      Cutting Surface DamageBottom disk prevents scalpingCan easily scalp turf
      Water UseCan cut in shallow waterUnsafe for wet trimming
      Dense Weed EfficiencyExcellentModerate
      WeightHeavier (~4 lbs)Lighter
      Best UseDetail edging, clean finishFast clearing of big areas

      Who Should Use Power Rotary Scissors?

      • Homeowners who want perfect lawn edges and blended cuts.
      • Landscapers performing precision detailing around beds, patios, and walkways.
      • Anyone trimming near water or delicate plantings where flying debris is a risk.
      • DIY lawn enthusiasts who are tired of replacing trimmer line constantly.

      Not ideal for: clearing large overgrown fields quickly or users who want the lightest possible trimmer head.


      Installation & Setup

      1. Check compatibility: Works on most straight-shaft trimmers with solid drive shafts (25 cc or larger).
      2. Remove the existing trimmer head by loosening the retaining nut.
      3. Install the rotary scissors using the correct adapter sleeve and tighten securely.
      4. Wear safety gear including gloves, hearing, and eye protection.
      5. Lubricate and sharpen the blades regularly for optimal performance.

      Cost and Where to Buy

      Most Power Rotary Scissors retail between $200 and $300 depending on the brand and size. A 9.5″ standard model is perfect for most residential and commercial edging.

      If you’re ready to upgrade your lawn care game, here’s an Amazon link to purchase one:

      Buy Power Rotary Scissors on Amazon


      Maintenance Tips

      • Sharpen blades every 10 hours of use or if cutting performance drops.
      • Apply EP grease to the gear and shaft periodically.
      • Check the mounting bolts and adapter fit before each use.
      • Store in a dry area and clean off debris after every session.

      Summary: Why Rotary Scissors Are a Game-Changer

      • Precision and Cleanliness: Perfect edges without jagged string damage.
      • Safety: Minimal debris and safe around windows, pets, and people.
      • Durability: Sharpenable blades mean less frequent replacement parts.
      • Versatility: Great for edging, aquatic trimming, and professional detailing.

      If you want to turn ordinary trimming into professional-level landscaping, the Power Rotary Scissors is the ultimate upgrade. Add one to your toolkit and enjoy the cleanest edges your yard has ever seen.

    • When Neighborhood Dogs Turn Your Yard Into a Bathroom: Challenges, Solutions, and Prevention Tips

      Maintaining a beautiful yard is a labor of love. From carefully mowing your lawn to fertilizing, watering, and keeping it free of weeds, your yard is often a reflection of your home and pride in your property.

      But for many homeowners, there’s one frustrating problem that can undo all your hard work—neighborhood dog walkers using your lawn as their dog’s personal bathroom.

      Dog pee burns your grass, dog poop leaves unsightly (and unsanitary) messes, and constant traffic can ruin the health of your yard. Worse yet, if you live in a neighborhood where people walk their pets frequently, your front lawn can quickly become a target zone for repeat offenders.

      In this guide, we’ll cover:

      • The damage dog pee and poop cause to your lawn
      • Laws and regulations about dogs using other people’s yards
      • Prevention strategies to keep your lawn healthy and dog-free
      • Neighborly and legal ways to deal with repeat offenders

        Why Dog Pee and Poop Damage Your Lawn

        Before we dive into solutions, it helps to understand why dog waste is so damaging to grass.

        1. Dog Pee Causes Lawn Burn

        Dog urine is essentially high in nitrogen and salts. While nitrogen is actually a nutrient that lawns need, too much nitrogen in one concentrated spot acts like fertilizer burn.

        • Symptoms of dog pee damage:
        • Small round yellow or brown patches in the grass
        • Green halo or ring around the dead spot
        • Repeated damage in the same spot if dogs return to the area

        Female dogs tend to cause more concentrated damage because they squat in one place, while male dogs often mark multiple spots in smaller amounts.

        2. Dog Poop Isn’t Fertilizer

        Some people mistakenly believe that dog poop is like cow manure or compost and is good for grass. That’s a myth.

        • Dog poop is acidic and nutrient-heavy
        • It can smother grass and promote fungus
        • It breeds bacteria and parasites such as E. coli and roundworm

        Not to mention—it’s just plain gross to find someone else’s pet waste in your yard, especially if kids play there.

        3. Frequent Foot Traffic Compacts Soil

        Even if a dog just walks across your lawn repeatedly without relieving itself, foot traffic compacts the soil. Compacted soil prevents grass roots from getting enough air, water, and nutrients. Over time, this leads to thin, unhealthy turf, making it even more vulnerable to damage from dog waste.


        Are There Laws Against Dogs Using Your Yard as a Bathroom?

        The short answer is: Yes, in most cities, dog owners are legally required to control their pet’s waste.

        Here are the common regulations:

        1. Pooper Scooper Laws

        • Most cities and HOAs require pet owners to pick up after their dogs immediately.
        • Failing to do so can result in fines ($50 to $500) depending on the city.

        2. Trespassing and Leash Laws

        • Dogs generally must remain on a leash on public property.
        • Allowing a dog to enter private property without permission can be considered trespassing.

        3. Nuisance or Property Damage Laws

        • Damaging a neighbor’s property (like killing grass with dog urine) can fall under nuisance laws.
        • Repeated offenses can give you grounds to file a formal complaint with local animal control or your HOA.

        Tip: Check your local municipal code or HOA rules for specifics—they often back you up if you need to address repeat offenders.


        How to Prevent Dogs From Using Your Lawn as a Bathroom

        While laws exist, enforcement is often tricky. Most homeowners prefer prevention first. Here are proven ways to protect your lawn:

        1. Install Subtle Barriers

        • Short fencing or edging: Even a 12- to 18-inch decorative border discourages most casual dog walkers.
        • Hedges or low shrubs: A natural barrier makes your lawn less accessible.

        2. Use Dog Repellents

        • Commercial sprays: Nature’s Mace Dog Repellent, Liquid Fence Dog & Cat Repellent
        • DIY options: Citrus peels, vinegar solution, or light cayenne pepper (reapply after rain)

        3. Install Motion-Activated Devices

        • Motion-activated sprinklers: Spray water when motion is detected
        • Ultrasonic repellents: Emit high-pitched sounds that dogs dislike

        4. Lawn Care Practices to Mitigate Damage

        • Water spots immediately to dilute urine
        • Apply gypsum to neutralize salts
        • Overseed thin areas to keep your lawn resilient

        5. Communicate With Your Neighbors

        Sometimes a polite conversation is the easiest solution. Show photos of damage, explain the problem, and suggest alternatives like using the street strip instead of your lawn.

        6. Use Signage Wisely

        Small “Please Curb Your Dog” or “Private Property – No Pet Bathroom” signs serve as visual reminders. Combine with cameras or sprinklers for better deterrence.


        How to Handle Repeat Offenders

        If one neighbor’s dog continues to damage your lawn, it’s time to document and escalate:

        1. Install Security Cameras: Doorbell or yard cameras capture proof for complaints.
        2. Send a Friendly but Firm Note: Be polite but clear, and reference local ordinances.
        3. Contact Animal Control or HOA: Provide evidence and request formal action.

        Important: Avoid unsafe barriers or chemical retaliation—they can create legal trouble.


        Protecting Your Lawn Long-Term

        1. Fixing Dog Pee Spots

        • Rake and remove dead grass
        • Apply gypsum or lime to neutralize urine
        • Overseed with fresh grass seed
        • Water deeply until grass recovers

        2. Sanitizing After Dog Poop

        • Use a scoop or shovel to remove waste
        • Hose down the area to dilute residue
        • Apply pet-safe disinfectant to reduce bacteria

        3. Strengthen Your Lawn Overall

        • Fertilize appropriately without overloading nitrogen
        • Aerate annually to prevent soil compaction
        • Use resilient grass types like Bermuda or Fescue

        Final Thoughts

        A beautiful lawn requires hard work and consistent care—but nothing can ruin it faster than unwanted dog traffic and waste.

        By understanding the damage dog urine and poop cause, knowing your local laws, and using a mix of preventive and repair strategies, you can protect your lawn and keep it looking its best without unnecessary neighbor drama.

        With the right approach, your yard can go back to being your peaceful green oasis instead of the neighborhood dog park.

      • Why Homeowners Brush Off Morning Dew from Their Lawns: The Full Guide to Why, How, and the Benefits

        If you’ve ever taken an early morning stroll through your neighborhood, you might have noticed something peculiar: some homeowners are out on their lawns with a broom, rake, or even a piece of PVC pipe, brushing the dew off their grass.

        At first glance, it might seem like a quirky habit, or maybe you thought they were just fussy about their lawn. But there’s more to this morning routine than meets the eye. Brushing dew off your lawn isn’t just a tradition passed along by meticulous lawn enthusiasts—it actually has real benefits for the health of your grass and the overall appearance of your yard.

        In this comprehensive guide, we’ll explore:

        • What morning dew is and why it forms
        • Why brushing dew off your lawn is beneficial
        • The risks of leaving dew on your grass
        • How to properly brush dew off without damaging your lawn
        • Tools and tips for an easy dew-removal routine

        Whether you’re a weekend lawn warrior or simply curious about your neighbor’s early morning ritual, by the end of this blog, you’ll know exactly why some homeowners swear by dew removal—and why it might be worth trying in your own yard.


        1. Understanding Morning Dew

        Before we can talk about why people brush dew off their lawns, let’s first understand what dew actually is.

        Morning dew forms when moisture in the air condenses on cooler surfaces, like grass, overnight.

        Here’s the science in simple terms:

        1. During the day, the sun warms up the ground and grass blades.
        2. At night, temperatures drop. When the grass cools down, the moisture in the air condenses on the surface.
        3. Result? Tiny water droplets form on the tips of your grass blades—what we call dew.

        Some conditions make dew more likely to form:

        • Clear nights without clouds (clouds act like a blanket, trapping heat)
        • Calm, windless mornings (wind can prevent condensation)
        • High humidity the night before
        • Grass that is actively growing and healthy (it retains surface moisture more easily)

        While dew is natural and harmless most of the time, leaving your grass wet for extended periods can create problems, especially during certain seasons. This is where the practice of brushing off dew comes into play.


        2. Why People Brush Morning Dew Off Their Lawns

        So why go through the trouble of brushing dew away? For most lawn enthusiasts, it comes down to prevention and lawn health.

        2.1 Preventing Lawn Diseases

        Excess moisture on grass blades creates the perfect environment for fungal diseases. Common lawn fungi include:

        • Dollar Spot – Small, silver-dollar-sized patches of dead grass
        • Powdery Mildew – White or gray powdery growth on grass blades
        • Rust Fungus – Grass develops orange or brown dust-like spores
        • Brown Patch – Large circular dead zones in lawns, common in summer

        Fungal spores thrive in warm, moist conditions. Dew that lingers into late morning or early afternoon prolongs the wetness period on your lawn, which fungi love.

        By brushing off the dew early, you help the grass dry out faster and make it harder for fungal infections to take hold.

        2.2 Protecting Grass from Frost and Cold Damage

        In cooler months, dew can combine with near-freezing temperatures to create frost.

        • If you walk on a frosted lawn without removing the dew first, the grass blades can break, leaving brown footprints behind.
        • Brushing dew off before frost sets in or after a light frost helps prevent damage.

        This is especially important for cool-season grasses like fescue, rye, and bluegrass, which are more common in northern climates.

        2.3 Encouraging Healthier Morning Photosynthesis

        Here’s a fun lawn care fact: Grass needs sunlight to photosynthesize efficiently.

        When your lawn is covered in thick dew droplets:

        • Sunlight scatters on the water beads instead of directly reaching the grass blade surface.
        • Water droplets can even act like magnifying glasses, potentially causing minor sunscald during bright mornings.

        Brushing dew off first thing in the morning reduces the barrier between the sun and the grass, giving your lawn an early boost in photosynthesis.

        2.4 Improving Lawn Appearance and Maintenance

        If you’re the type who mows your lawn in the morning, you’ve probably noticed that wet grass is a nightmare to mow.

        • Clumping: Wet grass clumps under the mower deck.
        • Uneven cut: The mower blades can tear rather than cut cleanly.
        • Messy cleanup: Wet clippings stick to shoes, driveways, and the mower itself.

        By brushing dew off:

        1. You allow the grass to dry faster.
        2. You get a cleaner, sharper cut when you mow.
        3. You reduce the chances of leaving clumping marks in your otherwise beautiful lawn.

        2.5 A Daily Inspection Opportunity

        For many lawn enthusiasts, brushing off the morning dew is about habit and observation.

        • It gives you a chance to walk your lawn daily.
        • You can spot problems early, like pest damage, weeds, or the start of fungal spots.
        • You can also enjoy the peaceful, meditative routine of caring for your yard first thing in the morning.

        Think of it like brushing your teeth—it’s preventative care for your lawn.


        3. The Risks of Leaving Morning Dew Untouched

        If you’re wondering, “Do I really need to bother with this?” here’s what can happen if you leave morning dew on your grass all the time:

        • Increased risk of fungal diseases (especially in spring and fall)
        • Prolonged wet conditions that stress grass in shaded or poorly drained areas
        • Unsightly brown patches or footprints during frosty mornings
        • Slower drying times for mowing, making lawn care more frustrating

        While not every lawn requires daily dew removal, if your lawn is prone to disease, heavily shaded, or in a humid region, this simple habit can make a big difference.


        4. How to Brush Dew Off Your Lawn

        So, how do homeowners actually brush dew off their lawns? Surprisingly, it doesn’t take much effort or special equipment.

        4.1 Use a Simple Lawn Brush or Broom

        A soft-bristle push broom or a dedicated lawn brush works perfectly.

        • Start at one end of the yard and gently sweep across the tops of the grass blades.
        • Move in long, overlapping strokes like you’re vacuuming a carpet.
        • Avoid pressing too hard—you’re not scrubbing the grass, just moving water droplets off.

        4.2 Drag a Hose or Rope Across the Lawn

        This is an old-school golf course trick:

        • Take a garden hose or a length of rope and drag it lightly across the lawn.
        • The slight disturbance knocks dew droplets off the grass quickly.

        This method is fast for larger lawns and saves you from walking every square foot.

        4.3 Use a Leaf Rake (Gently!)

        flexible plastic or bamboo leaf rake can also be effective:

        • Pull it lightly across the grass surface to shake off the moisture.
        • Avoid metal rakes with sharp tines—they can damage the grass if you’re too aggressive.

        4.4 Walk the Lawn with a Pole or PVC Pipe

        Another easy method is simply walking the lawn with a lightweight pole:

        • 10-foot piece of PVC pipe works great.
        • Hold it horizontally and sweep it gently over the tops of the grass blades as you walk.

        This technique is very popular for sports fields and golf greens because it’s fast and covers wide areas.

        4.5 Timing Matters

        The best time to brush dew off your lawn is shortly after sunrise when:

        • Dew has fully formed overnight.
        • Grass is still cool, but the sun is starting to rise.
        • Drying will happen quickly after you remove the surface moisture.

        5. Tools and Tips for Easier Dew Removal

        • Invest in a long-handled push broom or a wide lawn brush to reduce bending.
        • Wear waterproof shoes or boots—your lawn will still be damp after dew removal.
        • Plan your route so you’re not walking over the same spots repeatedly, which can flatten grass.
        • Consider a simple DIY tool: Many lawn care enthusiasts create a “dew whip” with a rope or chain to pull across their grass for fast coverage.

        6. Benefits You’ll Notice Over Time

        1. Healthier, disease-resistant lawn
        2. Cleaner mowing sessions with less clumping
        3. Reduced brown patch and footprinting in cooler months
        4. More consistent lawn color and growth
        5. Peace of mind knowing you’re actively preventing lawn stress

        It’s one of those small habits with big payoffs—especially if you pride yourself on having the best lawn on the block.


        7. Final Thoughts

        Brushing morning dew off your lawn might seem like a small or even unnecessary chore, but for dedicated homeowners and lawn enthusiasts, it’s part of a smart, proactive lawn care routine.

        The practice:

        • Keeps your grass healthier
        • Reduces the risk of fungal disease
        • Makes mowing easier and cleaner
        • Encourages a lush, vibrant lawn year-round

        Next time you see a neighbor out there in the early morning with a broom or a hose, you’ll know—they’re not just tidying up; they’re protecting their lawn’s long-term health.

        And if you want a simple, satisfying ritual that sets your yard apart, maybe it’s time to join the morning dew crew.

      • Mushrooms in Bermuda Grass – What It Means and What to Do About It

        If you’ve stepped outside and noticed small clusters of mushrooms popping up in your Bermuda grass, you might be wondering: Is this bad for my lawn? Should I pull them up? Will they hurt my grass?

        The truth is, mushrooms in your lawn aren’t always a bad sign. In fact, they often tell you something positive about your soil. But there are also times when you may want to take action. Let’s break it down.

        Why Mushrooms Grow in Bermuda Grass

        Mushrooms are a natural part of the ecosystem. They’re the fruiting bodies of fungi living in your soil, and they appear when conditions are just right — usually after periods of moisture, warm temperatures, and high humidity.

        Some of the most common reasons mushrooms grow in Bermuda lawns include:

        • Organic matter in the soil – Mushrooms feed on decaying plant material like old roots, buried wood, and grass clippings.
        • Recent rainfall or irrigation – Mushrooms thrive in moist environments, so heavy rain or overwatering can cause a sudden outbreak.
        • Healthy soil activity – A robust fungal presence means your soil is alive and working to break down organic matter, releasing nutrients for your grass.

        Are Mushrooms a Bad Sign for Bermuda Grass?

        In most cases, mushrooms are not a sign of disease or a threat to your Bermuda grass. In fact, their presence often indicates:

        • Healthy soil biology – Mushrooms are part of a balanced lawn ecosystem.
        • Good nutrient cycling – The fungi help decompose organic matter, releasing nitrogen and other nutrients your Bermuda grass needs.

        However, there are a few scenarios where mushrooms can signal issues:

        • Excess moisture – Consistently wet soil can promote fungal overgrowth and root problems.
        • Poor drainage – Water pooling in certain areas can lead to mushrooms and turf stress.
        • Buried debris – Old wood or roots under the lawn can become long-term mushroom food sources.

        The Benefits of Mushrooms in Your Bermuda Grass

        You might be surprised, but mushrooms actually bring some perks to your lawn:

        1. Natural fertilization – As fungi break down organic matter, they release nutrients your grass can use.
        2. Improved soil structure – Fungal networks (mycelium) help soil retain moisture and promote root health.
        3. Biodiversity – A diverse lawn ecosystem can make your turf more resilient against pests and diseases.

        Think of mushrooms as nature’s recyclers — they turn old, dead material into life-giving nutrients for your Bermuda grass.

        Should You Remove Mushrooms from Your Lawn?

        Removing mushrooms is more about personal preference and safety than lawn health. They won’t harm your Bermuda grass directly, but you might want to remove them if:

        • You have pets or young children (some mushrooms are toxic if eaten).
        • You don’t like the look of them.
        • They’re spreading heavily in one area.

        How to remove mushrooms:

        • Wear gloves and pick them by hand, or use a small rake.
        • Dispose of them in the trash — not the compost pile — to avoid spreading spores.

        Will Mushrooms Damage My Bermuda Grass?

        No — mushrooms themselves won’t damage your Bermuda grass. The underlying fungus lives in harmony with your lawn, often improving soil health.

        The only risk is if mushrooms are a symptom of overly wet soil, which can stress Bermuda grass roots and promote turf diseases. If mushrooms appear after every watering, it might be time to adjust your irrigation schedule.

        How to Reduce or Prevent Mushrooms

        If you’d prefer to keep mushrooms to a minimum, try these tips:

        1. Adjust watering – Bermuda grass likes deep, infrequent watering. Avoid daily shallow watering.
        2. Improve drainage – Aerate compacted soil and address low spots where water collects.
        3. Remove organic debris – Rake up clippings, leaves, and old mulch.
        4. Dethatch when needed – Thick thatch layers can trap moisture and encourage fungi.
        5. Sunlight exposure – Trim overhanging tree branches to allow more sunlight to reach damp areas.

        Final Thoughts

        Mushrooms in your Bermuda grass are usually a sign of healthy soil, not a problem. They’re part of nature’s recycling team, breaking down organic matter and enriching your lawn.

        However, if you dislike their appearance or have safety concerns, you can remove them and reduce the conditions that make them thrive.

        In short — don’t panic when you see mushrooms. In many cases, it means your Bermuda grass is growing in a thriving, living ecosystem.

        Pro Tip: If you ever notice mushrooms accompanied by yellowing or thinning grass, that could be a sign of excessive moisture or lawn disease. In that case, check your watering schedule and consider a soil test.